So, My guild defeated Yogg last night, not in part due to practising on 10 man.
Yogg was recently nerfed (you can look up the changes on the blizzard website) and I dont actually think it will make much of a difference to anyone still working on downing him with 4 watchers. It WILL make a huge difference to the hard modes (not losing as much sanity being the major one). No MCs in Phase 1 doesn't really make a huge difference to the phase, it just removes the RNG from it and causing needless wipes. So, I actually agree with that one. Nerfing the spawn rate I think was unnecessary.
Shopping list:
3 tanks
5 healers
8-9 melee
9-8 ranged
Tips for the fight with 4 watchers. At all times your raid should maintain their own sainty. The green beams give you back 20% per tick.
Phase 1
This was fairly straight forward. We stand near the door to avoid the gas clouds. Tanks ferry the adds to sara. We DPS the adds to about 30% before switching to the next one. We also have about 3 ranged DPS who are capable of dodging clouds nearer the centre to finish off adds that need a hand. We do not spawn an extra add, we dont need to to just kill yogg. Once Sara is dead, split the additional mobs up and smash them down. Healers watch and heal up the explosions.
Key things:
Make sure every add hits Sara. Do not spawn any extra adds. Keep this phase under control and clean up all adds before phase 2.
Phase 2
You must have cleared out all the phase 1 adds before the tentacles appear! Very important.
Melee team
There are 10 portals, East, North and West. Allocate 9 melee and one healer to enter these portals. Allocate groups of 3 to the 3 sides to make it easier. Once someone enters a portal THAT PORTAL VANISHES, so the allocation really does help. If you are having issues, allocate individuals portals, but I hope that would not be necessary.
If a melee gets put in a constrictor on the way to their portal, the other 2 melee must get them out. If by chance that melee is the last one through the portal, and they are nowhere near the ranged team, sorry... wait for a b-rez - that is literally bad luck. The melee need to look after their own.
If a melee gets brainlinked, who ever is brainlinked with the melee MUST go with them to the portals, then return to their own job once the link severs as the melee go in the portal.
This is all about tentacle control. The faster the tentacles are killed in the portals, the less spawn in the main room. Melee are on the clock, do not skip a sinlge tentacle, and smash them as fast as possible. Blow all cooldowns on the first portal phase - and get the yogg brain to about 75%. Dont forget to turn your back to the skulls. This is not as easy as you might think. But with a bit of practise you will learn where the skulls could be (they are randomly placed in the room) and where to stand to minimise their impact. I cant really describe them here, just practise will help. But generally, if you have your back to the room and are facing the tentacles, you will be ok most of the time.
Once the tentacles are all dead, you head into the brain room. Yoggs hitbox is huge so eyeball the exit portal and head toward it as you DPS. There are dangly tentacles which move around and CAN get in the way of you clicking the exit portal and get you insane. Be aware of this and don't nub it up.
When melee get spat back out, they need to clean up all the corruptor tentacles they can possibly find.
When the portal phase comes up again, melee head back in (cleaning up corruptors and constrictors on the way) and this time blow heroism. Again, get to Yogg as soon as possible without missing a tentacle (remember killing tentacles in the portals means less outside) and smash him to about 50%. Pop out, kill corruptors and constrictors.
Third portal, blow any CDs that have come up and get Yogg to 30%. It is imperative that this happen on the third portal phase. Any more and you will run over the timer and probably be overrun with tentacles in phase 3.
Ranged Team
You guys get to stay outside. Mark up the main assist (your best ranged player) with an icon. Ensure that person has the ability to put their own marker back on themselves as DBM will probably remove it if something happens to them like brain link. If possible have a couple of people spamming a macro to mark up the assist. I also recommend reminding people on vent/ts to keep stacking on star (our symbol).
All ranged must stack on star and assist star at all times.
Now, what star has to do is this; smash crushers (moving off the crusher when the tank calls for it, more on that in the tanks section), get people out of contrictors whenever possible, and when there are no crushers or constrictors up, kill corruptors. They will move to wherever the next crusher is and clear out the area around that.
When the portal team kills all the tentacles and are on the yogg brain, the tentacles become stunned, making them much easier to kill and no new ones spawn.
Rinse repeat. If you find at any time that you are becoming overrun with tentacles call a heroism (requires a second shammy in the main room team) to help clear them out during a stunned phase if the melee were a bit slow that time (this might happen on the third portal). At the end of each stun phase there should be very few corruptors up. By few I mean less than 5.
Tanks
Your job is to reset crushers - the big huge tentacles. This is done the following way; Watch for the cast, call for DPS to change targets, wait a second until the stacks drop off, run in and hit the crusher, call for DPS again. Rinse, repeat as necessary.
Healers
There really isn't a lot of healing going on. Stay with the ranged team and heal as required. What IS necessary is decursing, and there will be a lot of it.
Phase 3
OK, so you made it to P3 with perhaps a crusher up and a couple of tentacles. Most of the raid is alive and no one is insane.
Adds:
Tanks pick up the adds as soon as possible, they hit like mack trucks to begin with, but get the pro melee team onto them and they soon shrink down into kittens. Get your taunts off as soon as you can, and stay with your back to yogg the entire time. This should be not too bad to achieve.
Melee:
DPS adds. You should be able to do this with your back mostly to yogg for maintained DPS time.
Healers:
Stand with your back to yogg and heal and decurse. Watch the boss timers for add spawns and time a nice big heal for that first hit from the add - it's a doozy.
Ranged:
Melt brain. Go hard, everyone is counting on you.
Troubleshooting:
Ok so you make it to phase 3 consistently, but you are still wiping. What's going on? Ask youself these questions:
Was P1 perfect?
Were all the adds from P1 dead before tentacles from P2 spawned?
Did melee kill all the tentacles in the portals?
Were brain link and the green death beams managed?
Were constrictors killed in a timely manner?
Were crushers dead by the end of the stun?
Did melee keep corruptors under control after a portal phase?
Did ranged stack on star and assist correctly?
Did you get to P3 in 3 portal phases?
Were there 1 or less crusher and 5 or less corruptors up at the start of P3?
Were there 23 or more alive, un MCed raid members ready to go into P3?
Did everyone stay calm in P3 and do their jobs?
If you answer no to any of these questions you need to figure out why you answered no and fix it. And just remember, the fix for a problem in P3 might be in the execution of P1!
This boss has the best wipe enrage mechanic I have seen! I wont tell you what it is, I just hope you get to experience it because that it part of the learning curve to kill yogg!
Good luck
Showing posts with label Ulduar Normal. Show all posts
Showing posts with label Ulduar Normal. Show all posts
Tuesday, June 16, 2009
Friday, May 29, 2009
General Vezax is a pussy
He is. Pussy pussy pussy.
Here's our amazering strat-fu.
Melee and heals bunched up and hit Vezax. All healers were autoattacking the boss for ret pally healing on themselves. This also meant that the green blobs were likely to be hanging around the boss. They were dropped by ranged just outside of melee range, which was totally perfect for everyone involved. We had one downed on the boss, and that caused a wipe!
One healer (our healer lead) went and hung out with the ranged, to cover off when the range ended up OUT of range of the boss. Healer lead kept an eye on everyone's mana and marked up green sludge for range to drop. No one touched green blobs unless the healer RA called it over vent.
Healer allocated to 2 groups for mana regen and took it in turns to mana up.
We had a DK tanking and using CDs to muscle his way through the mini enrages. Healers were extra spammy to cover it off.
Ranged stacked up and stood in the black stuff. Life leechers ran away from the group. EVERYONE ran away when someone was targetted for the shadow crash (as shadow crash hits a spot on the groud where its target was standing, its not a heat seeking missile or living bomb like life leech)
EVERY.SINGLE.FLAMETHING.WAS.INTERRUPTED. => I think this was the most important thing of the entire fight. I think 2 were let through? Maybe? But everything else was covered off. We had the RL (a rogue) call out the interrupt rotation over vent.
What do I think were the most important things in this fight? Judgement of light by a ret pally on the boss is OP (free healing FTW). A DK tank makes this much easier, not movement for a boss always makes the fight easier. 8 healers is handy (our prot pally tank was ninjaed recently from the healer team). Interrupting 90% of the flame things.
All you do, is you take all of the above and do them all at once, and find that rhythm Vezax has a definate rhythm to him, and once your team hits that groove, you will down him. Don't panic, and just keep doing your job.
Friday, May 15, 2009
Mimiron washing machine strat
YES! Treat Mimiron like a washing machine and all your firestanding stains will be rinsed away.
By which I mean do the following in P2 and P4:
Allocate 3 groups (we used G345 in raid), and give them a third of the space each. Fortunately, this is well marked out on the ground for you already - Left RIght and Back as you enter the room. In each group put some ranged and 1-2 healers depending on the firestandyness of the people in each group. Each group is a self contained unit of healing.
Now, everyone arrange themselves in a little thirdish circle around the boss, as close in as you can get safely, staying nicely spaced horizontally from each other, and also not standing in front of each other relative to the boss. This is important because the cannons do line of sight damage, tearing through everyone in the way to their actual target. I hope that made sense. If not, go look it up, you will see what I mean.
Melee in groups 1 and 2 (with 3 healers - one in each third - we had to use 8 total healers to cover off the sheer output of helaing required PS Shammies are OP, we used 2) stay BEHIND the boss at all times, and dodge the cannons by running through the boss to the other side.
Ok the main issue we had was the retard beam. So, we solved it simply by saying: When the retard beam (P3Wx2) starts EVERYONE ROTATES CLOCKWISE ONE THIRD. You have no idea how much easier it made the fight for us. Healers didnt have to worry about moving back to their old positions, people were not running in front of each other and getting smashed by cannons. It was glorious to behold.
There are strats out there that do this by staking in 2 or 3 ranged groups. We found that the cannon damage was somewhat too severe to keep up with and this does a similar job with less aoe.
The healing allocations I gave below, are pretty much similar to this, and generally remain unchanged. We are just adding another group (LR and B now) and allocating healers to it as well.
Oh yeah, and GET OUT OF THE RED FIRE ON THE FLOOR! Do these things and mimiron will go down pretty fast. Actually, we got mimi down second attempt at using this strat, and we only ballsed up the first one cos people didn't listen between pulls and didn't realise their groups had changed.
Tuesday, May 12, 2009
Mimiron - Healing strat focus
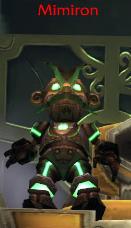
Mimiron comes in 4 phases as you know. He drives legs, body, head, and then Voltron.
I am going to talk about healing strat here, because there are plenty of resrouces about the technicalities of the fight and tanking it but I found next to nothing about healing it. And healing this fight is the key to winning - trust me when I say this. We are currently taking 8 healers (we have one DPS dual spec to help on this).
Legs: We split into 4 groups, one in the left third (G3, ranged DPS, 1 Raid healer, 1 MT healer), one in the right third (G4, ranged DPS, 1 Raid healer, 1 MT healer), one in the back third (G5, ranged DPS, 1 Raid healer, 1 MT healer), and one melee (Gs 1 and 2, one MT and one raid healer). Total - 4 MT healers, 4 raid healers (one of each in each "group"). "oh shit" order allocated for the punches ie GS, pain suppression and as a last resort, Hand of Sanc. Try not to use hand of sanc as there is enough pressure on healers as it is let alone spreading damage further around. It also leaves the pally at risk of sudden death if they get a random damage target. Raid healers were marked. It was DPS's responsibility to be in range of their healer in their section. Everyone should be alive at the end of this phase. Conserve as much mana as possible.
Body: This is where it is balls to the walls guys. Stay in your allocated areas. Again, L, R, B and Melee focussing on their groups, but now the MT healers are helping out as much as possible as well in their allocated group. There is no other way to describe this other than, HEAL AS HARD AND AS FAST AS YOU CAN, keep your group alive as a priority. Everyone needs to move out of the rocket target or you die (that's seen as a red thing on your feet). You need to run away from the lurker style retard check, See Washing Machine strat for more details there. This is when it is most likely people will die, but there is not alot you can do about it. The trick to this phase is to spot heal as much as possible, and try to keep the ranged loosely grouped together to assist with AoE healing. Shammies really shine in this phase.Head: You will mostly be oom at this point. There is a looooong talk time, this is where you top the raid up and get out of the 5sr and regen your mana as much as possible. Everyone will stack (either in 2 or 1 groups). The ranged tank wont requite much healing, 1 perhaps 2 healers will suffice. There will be OT healing, but not a lot. Apart from that ensure you finish this phase on full or near to full mana. And help out on smashing the head when it is down.
Voltron: Back to allocated sections just like P2. 2 healers on MT (no oh shits required thankfully) 1 on ranged tank and everyone else is balls to the wall crazy healing. Again, a lot of this will depend on people doing thier jobs and not fire standing. If you move, get back into position, but dont sacrifice healing out put to do so. If the MT healers get a chance to throw off the odd heal on anyone else, do so. Healers should NOT stop casting this entire time.
(Updated for Washing Machine AWESOME strat)
Friday, May 8, 2009
Hey, NER, why no Thorim?
Yeah.
Don't get me started on this.
Thorim has managed to turn into our guilds current cock block.
Thorim currently has issues with lag and DCing, and if it coincides with Wintergrasp we have zero chance of doing anythign useful on this boss. Anyone with a slightly dodgey connection, Thorim will eat your connection and spit it out covered in goo. As you run in, it is guaranteed 1-25 people will DC. No jokes. Just hold off DPSing down the initial "entertainment" before engaging the boss until all the DCers are back online. We do a ready check before starting the event.
Thorim has a lot of aoe, and many many many adds. Do everything in your power to minimise CPU/GPU/bandwidth issues on your PC. Turn graphics down, turn OFF as many mods as you possibly can, stop FRAPSing, face walls etc etc. This place is WORSE than Dalaran.
Anyway, assuming you get past the DCs, there are a few tricks you NEED to do.
Arena: 2 tanks - one for champions, one for evokers. Evokers heal, so they need to be interrupted and killed asap. Champions are just plain nasty and need taking out. You can and should Disarm them to prevent WW, get your rogues, surv hunters and DPS warriors onto it. Your DPS MUST assist the 2 tanks when they call for DPS. Apart from that, AoE mobs and do your best to stay alive. All your healers should be raid healing in there, the splash damage is NUTS!
Gauntlet: If your team know what they are doing, I solo healed this (with an OH throwing up some Hots occasionally) as a Holy Pally. So very doable. Its preferable to have at least 1 CC (hunters, shammies, mages) 2 if you only have 1 tank. Engage mini boss as soon as possible. With the second mini boss, have an OT pick up the adds and get a hunter up the stairs and MDing the next miniboss to the other tank ASAP. And I mean, as soon as the doors open. Burn the mini boss down at the bottom of the stairs for more room for running away from people with the bomb. Then run up the stairs (ignore the adds completely). DO NOT run into the big circles or big purple bubbles will make life unpleasant (run left or right of them).
Then engage thorim.
Run away from the lightning on the floor (the further away from thorim you are the further away you have to run from the lightning) and BURN LIKE CRAZY!
That's about it. Enjoy!
Assembly of Iron (aka Iron Council) Easy mode.
These guys are a walk in the park compared to Freya.
Easy mode is kill biggest to smallest and hard mode is smallest to biggest. Obviously we did easy mode first.
You will need 3 tanks - each of them drag their add off out of range of each other. We found that anything other than a bear able to tank Sarth 3D was getting oneshot on the big guy with our current gear level (ie mostly i213 with i226 highlights), so highly recommend something like this:
Big guy - bear
Middle guy - Warrior
Small guy - DK
The big guy puts a NASTY debuff (edit: our bear tank decided to call me on my terminology. This is apparently a magic debuff. But you lot knew what I meant, right? You have all read the technicalities of the fight on wowwiki or something eh?) on your bear which needs to be decursed (edit: *cough* dispelled by a pally or a priest, happy HB?) INSTANTLY. Make sure you have an allocated decurser watching the tank's cast bar. They should be spamming the decurse as the big guy casts his "Me squash tank now" spell as it starts ticking within a second! Master that and it's just tank and spank.
The middle guy throws out some serious damage but nothing that a Naxx25 holy pally cant solo heal with a bit of mana management. Make sure that if the tank moves the boss that he let's the healer know. Once big guy is down, we rotate tanks. Bear tanks middle guy and warrior heads off to help on little guy. Middle guy is again just watch for aoe (RUN AWAY LITTLE GIRL! RUN AWAY!) and tank and spank.
Little guy needs constant interrupts on whatever spell it is he does. When he is the last man standing he will periodically turn into a flying electrical octopus and totally pwn anything he touches. RUN AWAY! We dont care where (the tanks will follow and be ready to pick it up afterwards) just dont trap yourself in a corner.
Through all this, there will periodically be blue and green "fire" on the ground. Keep the bosses OUT of all this stuff. For you, Blue is good, green is BAD. (why couldn't they make it the other way aroung - cos alliteration makes things easier). So stand in blue for DPS buffs, and run out of green (or die).
Then the last boss is at about 10%, quickly suck down an iron boot flask and get yourself an extra achievement!
Freya with no adds
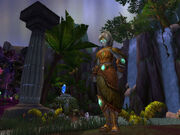
To be honest, I did not pay a lot of attention to Freya. She has a lot of trash, and is basically a Sarth 3D fight all on her own. She has 3 Elders that you can leave up to increment Hard Mode, in exactly the same way that Obsidian Sanctum did it. We had enough trouble learning in no adds mode, so I dont recommend you start on and Elders until you really have the boss herself sorted out.
Ok, so the strats for the add packs are well established, you can go look them up for yourself. The MT on Freya doesn't actually take much damage at all, and a holy pally/ret pally keeping light up on the boss will go a long way to topping the MT up.
The main trick to this boss making sure your DPS know how to follow instructions and to stop DPS and switch targets when the RL says to. That was our main issue. So, after a little pep talk on my behalf "Pull your finger out, now hover it over the escape key. When you are told to STOP DPS hit the escape key a lot. Got it? Good."
Flayer pack - bunch up but the main trick is to know when to stop AoEing (currently we are stopping when they are at about 20%), and how fast you can take down the flayers one at a time. Ensure you have a main assist to single target them down. Healer yell out if they are going too fast. If you are taking too long, AoE to less than you are, but somewhere around 20% should be fast enough.
3 twins - all need to go down at the same time. This seems to be a bit of a WotLK favourite at the moment. We found leaving the snaplasher (the one with the debuff) till last was the way to go, and to tank rotate on that boss too. Good Vent/TS calls from RLs are essential and deadly boss mods/bigwigs boss health bars are invaluable. It's Romulo and Julienne on steroids.
The other one - this one is pretty trivial. Mushrooms FTW! Run away if you have the bomb. Aura mastery will stop the silence and help the healers until they get to their first mushroom.
Trees - we allocated about 4 ranged DPS who had to drop everything and kill the trees. Worked well.
Now, this is a CRAZY fight, there are people running everywhichway, yells over vent, splash damage, aggro dumps and all kinds of other hyjinx. But as long as you do your job, listen to the calls and make sure you are on the right target doing the right kind of damage, this boss doesn't take too long to get the hang of.
Tuesday, May 5, 2009
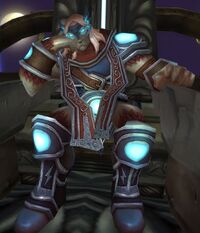
Hodir Normal
 Hodir has a few tricks, but mostly this is a noob check. You will quickly find out who is a fire/ice stander and who isn't, also who is capable of multitasking (ie moving looking at stuff and still do good heals/DPS).
This really is a fight of every individual getting it right. So here are a list of tips:
- Standing in the light wells is pro.
- Getting the elecricity buff is pro (ranged who get it run to melee as the buff spreads to those in range)
- Ranged get the adds out - mages first, they make toasty fires!
- Melee stay on the boss and stay alive.
- DONT EVER STAND STILL!!! (the debuff is removed one tick at a time, you might not be moving enough).
- Don't stand in blue runes, stop everything and get out.
- Run up the hills after they have been created or you might be stuck under them.
- Dispel any people frozen in place.
- Heal like crazy.
- Have a tank in frost resist gear.
- Pally aura mastery at the right time is very helpful - Generally at the frozen blows moment.
- Standing next to toasty fires is made of win.
- If you get the electricity debuff, we find it helpful to move into melee to boost their DPS.
Chances are you will run close to the enrage timer. Getting the buffs to the melee and standing in light wells is really important - they increase DPS tremendously, but the thing that increases your DPS the most is the hardest thing of all initially to get right: Staying Alive.
Tuesday, April 28, 2009
Crazy Cat Lady - Auriaya

How do you say that anyway? Or-ee-ah-ya? Where is the syllable emphasis? or-EE-ah-ya? Or-ee-AH-ya? or-ee-ah-YA? What is it with this instance and names of bosses I completely fail at being able to pronounce or even simply get right?
Anyway, crazy cat lady is not hard. I mean that in the strat sense.
In this, it is all about the pull. We have a DK tank DnD pull while everyone hides behind a corner (cos those cats POUNCE on you). The Warrior tank throws up a shield wall (and other CDs) to deal with physical damage, the pounce cant be shield walled, so get a pally to use Hand of Sacrifice on the tank to soak the pounce damage (bubbling helps here). The MT picks up Crazy cat lady, the DK taunts 2 cats off the warrior and takes them over there *points* 10 yards away, to deal with the debuffs.
Mark the cats up, and kill em. Then its cat lady's turn. Interrupt the sonic booms, and here's a handy trick to deal with the fears.
Get a priest in a group with a few healers and an interrupter (we had a rogue) perhaps the MT if you need. Priest uses fear ward on themselves and mass dispells the fear. Makes the fight almost trivial. Drop tremor totems for everyone else, or use personal fear removing abilities. Everyone move back to your positions after.
At some point another kitty will spawn, dps it down, and have the OT move it away from the raid to die (as it creates a big black icky spot on the ground that kills you. Not Nice).
Rinse, repeat! It's not at all hard. Like High King Maulgar, it's all about that pull, and I think HKM was harder.
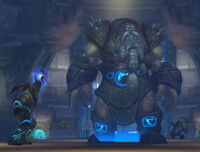
Kologarn 25

This one will be short, because there really is not a lot to be said about this boss.
The trash to this boss is annoying without a warlock. But judicious use of CC and you will be ok.
Kologarn himself is a very bug dude, I mean, we are the size of his belt buckle. The set up is easy, as per the standard you need 3 ish tanks, but you can probably do it with 2 if you had to.
There is a lot of directed and non directed damage in this fight, healers need to be on top of it.
The key to this fight is dealing with the eyebeams in such a way that your raiders don't run them through your raid exploding everyone in their path. The structure of the boss itself was something I really came to appreciate last night. There is a zone around the body of Kologarn where he does NOT target you for eyebeam, possibly for fear of missing and getting his nads. Pop your tanks and melee in there. Now, the hit box of the arms is HUGE, why is it huge? To cover the no eyebeam zone. This actually prevents hunters from being in there. The other mechanic to force ranged out is that this area silences casters. Neat huh? I thought so.
OK so melee are snugly in with the tanks stabbing at his stomach or arm uninterrupted.
Ranged, it's your time to shine!
We ended up in 2 ranged groups, one left one right with a healer allocated to each group. We spread out as much as we could, trying not to be one in front of the other. We also kept a path at the back free for kiting eyebeams. So, what we did was, eyebeam on you? run directly to the back wall and out the door. DO NOT run over someone else (hence the not trying to be in front of each other comment). Stay away from the adds (pew pew range them down).
That's it, that is the main trick to this fight. Really. Thats all! That is the main thing you need to do. And doing it right is not something you can explain. You just need to be aware and put in contingency plans for moving healers.
Eyebeams. Dont kill your raid mates with 'em and you will collect phat lewtz.
If you are having issues, try to melee stack the raid as much as possible.
Monday, April 27, 2009
Baby Faced XT-002 Deconstructor
XT, I swear, has some of the most amusing emotes currently in the game. He(?) also has the emotes which are likely to get the most annoying fast in the game.
So, some tips for getting the kid down.
Raid makeup:
1 MT + 2ish MT healers
2 OTs + 1 OT healer
Melee
Ranged
4 Ranged healers (you will need it)
First up is raid distribution.
Deadly boss mods has a thing that you can use which is a range finder. Type /range then drag it where you like it. Right click on it and set the range to 15(ish) yards. This is really important for later.
Tanks and melee and the OT healer
This one your MT tanks XT in the middle where he paces to, MT healers are at a safe distance behind the MT. Melee split into 2 groups, one on the right arse cheek one on the left. Melee need to make sure their range checker does NOT have the MT on it, nor the OT/Melee healer. The OT/melee healer stands at range behind the melee. Yes, behind. When melee get grav bomb or light well, they run off to the left or right (as is sensible) and get out of range of the other melee. They stay IN range of their healer. It is easy enough to do. If the MT gets moved everyone repositions, don't just mill around like an idiot and wonder why you cant reach the melee anymore or why you are not getting heals.
XT has a massive hit box, take advantage of that.
The melee stay on the boss, then move to the heart, then back on the boss. Rinse repeat. They assist on adds as required.
OTs and the OT Healer
There are 2 OTs, one for the left side one for the right. They need to pull adds they are tanking towards the stairs so the OT healer can keep them alive. Help from the "raid healers" may be required.
Ranged and add control
The MT healers get first pick of spots. Everyone else spreads out, that range checker should be on, and no one should be within 15ish yards of each other - this means minimal movement. Raid healers allocated to "left" "right" and "middle" as necessary. Ranged should be allocated to add spawn points as necessary; do your thing when the adds are out and smash the boss/heart when not. Never under any circumstances, let the little crappy bots get to XT. Get melee on it if you have to, but XT must never heal.
The Heart
This is probably the most important part of killing XT. If you can afford to ignore adds during this phase, I really recommend you just let the OTs to it. The first heart phase is the most important, there are no adds up and everyone can DPS the heart, except trees. Leave the trees to heal. Pop Heroism, pop all your CDs, get as much DPS on that heart the first time around as you can. If you do enough DPS then smash XT, you will miss a tantrum or several as you will have skipped past it on the health meter. The more tantrums you can miss, the easier it will be on the healers.
That's it. Not hard really, just a bit punishing on the healers and keeping the adds under control (as usual) is key. Good Luck!
Friday, April 24, 2009
Razorscale/gore/fang/face/wing/thing
 For some reason I keep calling this boss some variant of razor that isn't actually its name. No idea why, but I blame Nethersprite. It's all his fault.
 Anyway, there are a few strats out there for this boss, some involve spreading out, some involve bunching up. We kinda did something halfway inbetween and MAN did it make healing easy. Again, I am not writing up the boss strat, you can look that up yourself.
Firstly, and importantly: Stay inside the circle (or as close to that as possible).
Phase 1 (100%-50%)
We had 3 tanks, our warrior was in charge of tanking the whirlwind guy. The other two picked up everything else, one on the left side, one on the right. Melee were split into 2 groups, one for the left tank, one for the right tank. It was melee's job to interrupt the chain lightnings. Really important to stay on top of that as that chain lightning HURTS and can oneshot the last person on the chain (as I found painfully one time). There was one MT healer allocated to each tank.
Ranged hang out in the middle, and dps whatever. BUT if the big whirlwind guy comes out, they have to switch targets and burn that add down asap. Melee STAY AWAY or you will become very splattered.
Raid healers hang out in the middle, and keep an eye on melee and ranged. If melee are doing their job, there should be little AoE damage. But hang on... what about the blue flame? I hear you ask. AH....
Razorface, we noticed, targets the closest person to it with the blue flame. So we had a designated "flame tank" whose job it was to dance underneath Razorblade and attract his attention. This allowed the healers a much better chance of keeping people alive. Raid damage became controllable and predictable. We have not seen this written anywhere, but we experimented with it, and it seems to be holding true.
At some point you will bring Razorgore down and it will be time to PWN FACE. Adds, at this stage, should be left to their own devices and held in check by the tanks. Resto druids should be keeping these tanks alive (as trees cant DPS. Fail trees). Everyone and his pet worg should be throwing everything they have got at Razorfang. Pop cooldowns, pop heroism, pop haste pots... think of sarth 3d type zerg then buff that drake by 175% (I'm not kidding). Yell at your DPS to go hard, I wanna see holy novas, holy shocks and electricity! I wanna see crits and hysteria! I want to see that boss percentage SUB 75% on that first grounding.
Ok, up it flies and it's time to head back into position and back to taking care of business.
Second grounding you want that proto-mechano-drake sub 50%. GO hard. This fight is much easier if you only have 2 ground phases not 3. 3 is doable, but you are likely to down it after enrage.
Phase 2 (50%-splat)
 Ok, now get your MT (who should be the whirlwind tank) straight onto that dragon cos all of a sudden there's an aggro table! so be careful! Now, the tanks will be taking a debuff called "fuse armour". When it hits 2 stacks swap tanks. All Tank healers keep the current MT up.
DPS should get all the adds down first to free up the tanks to tank razorthing. Then everyone on the boss. Kill kill kill! Beat that enrage timer, check CDs at this point.
See that circle on the ground? Yeah? good. The current tank needs to kite backwards along that circle, like grobbulous. NO ONE gets ahead of the tank on that fight or you DIE. Watch for fire on the ground melee and all is good.
That's it. Not a difficult fight, just a lot of damage going around and a lot of chaos and some SERIOUS DPS required.
25 Flame Leviathan - plus two or three towers
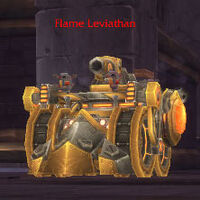
Everyone knows how to do Flame Leviathan, I am not going to explain the basic strat, I am going to explain things that are VITAL to getting a two or three towers under control. Four towers is an entirely different matter, that will have it's own strat post.
There was a lot of confusion about "hard mode". When you start, you can initiate the event by talking to one of two people. If you talk to Brann, none of the orbital defense systems are activated. This is Normal Mode.
If you talk to Norgs (as I affectionately dubbed him) he sets off the towers. All of them. As you move through the gauntlet you DESTROY the ones you do not want to do, leaving up the ones you do.
The towers we are currently doing (in order of preference) include:
Tower of Storms (Thorim's Hammer) – deals Boosts Flame Leviathan's Physical Damage by 25%. Shortly after the fight starts, Flame Leviathan will activate Thorim's Hammer. Thorim's Hammer causes pillars of light to appear and shortly afterward do around 10% (150k or so) damage to any targets under the beam along with a 1% damage AOE to all vehicles. Total of about 20 Beams. Flame Leviathan will activate this only once. Just, dont stand in any beams and you will be ok.
Tower of Flames (Mimiron's Inferno) – Boosts Flame Leviathan's Fire Damage by 50%. Shortly after the fight starts, Flame Leviathan will activate Mimiron's Inferno. Mimiron's Inferno causes fiery orbs to fall from the sky in a slowly set path. Orbs start where Flame Leviathan entered the room and continues in a clockwise direction in a diamond formation. Orb strikes deals fire damage to all nearby enemies, leave behind a flaming blaze that deal damage over time when touched. Effect lasts for the entire fight but are pretty easy to avoid.
Tower of Frost (Hodir's Fury) – Hodir's Fury cause's several White-Teal beams to appear and follow players around. The beam itself does no damage but after it stops moving on top of a vehicle, it will call down a ball of frost that deals frost damage to all nearby enemies and entombing them in ice where they take an additional 1% damage per second. Ice is broken by a fire attack. Effect lasts for the entire fight. Simply move directly forward or backward when you see the beam"lock on" to you and you will avoid this.
The above three towers are pretty easy mechanically. One leaves a trail of fire you need to avoid (easy if you pay attention), one has big beams from the sky that chase you around and one puts out a singular random event of big blue AoE bolts from the sky. Save shields for this event. Apart from that, it is business as usual, except FL has more health, so you just need to be good at not taking damage and good at dealing it.
Shutdowns
The key to this fight are the shutdowns.
Send 2-3 people up as soon as FL is engaged. They are marked, their vehicles are marked, and we have allocated a chopper to each player to pick them up and deliver them back to their vehicle after shut down. They then quickly grab some pyrite and are thrown up as soon as possible. Getting this cycle right, ensuring there is minimal down time and that the people do not die is the way to kill this boss.
The 3 people are 2 DPS and a DPS off healer (like an ele shammy, they do this the best). If you have no healer up there you will die. It's not a lot of damage but it is enough to kill most guilds in Naxx or early Ulduar gear. You NEED to have ranged go up as when you are on top of FL you cannot move. You are thrown to a position with a tower to kill. Kill your tower, then target another tower and kill it asap. Once all 4 towers are destroyed, FL shutsdown and the DPS are flung off the top of the tower.
Once Flame leviathan has finished repairing his towers (the reason for the shutdown in the first place) he comes out of shutdown and activates again. As soon as shutdown is over, you can send up your team again to repeat the process.
DPS during a shutdown
This is where about 80% of your damage will come from. FL takes extra damage while in shutdown - take advantage of that.
Demolishers must be fully stocked or close to it (it takes 2 pyrite to fill the tanks), and they need to launch all their pyrite at FL during this phase. Those pyrite launchers do stupid amounts of damage. It doesn't matter if you dont DPS any other time (apart from keeping tar alight) your main job is to make sure all that pyrite lands during shutdown. If you are a passenger who is not on the tower, keep stocked with pyrite, mash your rockets (2) and keep tar alight (1).
Siege engine passengers should be keeping the odd tar alight with (1) but mostly mashing (2) as that is a very powerful attack.
Choppers get that tar down, and keep laying it! If you get bored, grab some pyrite and shuffle it near the demolishers.
Doing all of the above should get you a really good dose of death on FL.
What to do when NOT in shutdown
DPS is not so important at this point, but not unimportant, if that makes sense.
Demolisher passengers (once back in the vehicle) grab pyrite asap. Those not getting flung should be shooting down pyrite for the flung ones to quickly retrieve. Once they are done, load yourselves up. Keep tar alight, and DPS when you have time. Your job is to stay as alive as possible. Stay at range.
Siege engines get in and interrupt the flame jets. Passengers keep mashing (2) as you are the main DPS dealers for this phase of the fight and only hit (1) when you see unlit tar. When the 5s warning comes in your fave boss mod, all siege engines get away from FL so that you have a good head start on kiting if you happen to be picked. If Thorim's hammer comes, make sure you have a shield ready (1 min CD). Passengers, if you can, make sure that you shoot down pyrite when possible as well!
Choppers will pick up their person, and return them to their vehicle as fast as they can, then back to dodging around and dropping tar. Again, try shuffling pyrite into the middle to help the demolishers.
What to do when kiting
Run away. Stay as far away as possible. Passenger should be liting tar as they go. Kite the FL through tar, I cannot stress how important that is, and make sure that tar is lit up. Avoid the orbital defense fires, try not to get trapped by them. Easy *cough* yes, easy!
That's it. Rinse repeat. Make sure that you take as little damage as possible, and you maximise DPS during shutdown. It should take 2-3 shutdowns to get the boss down depending on how well you kite him through tar at other times.
This applies to 10 man as well, just fling 1-2 people not 2-3!
Practise your shutdowns with two or three towers up ready for four towers. Two or three towers have been nerfed a fair bit recently, and they are a lot easier now than when this guide was first written (We found that 4 towers now is as hard as 2 towers was back in 3.1.0). Yes, you can almost certainly Zerg through 2 towers now with no shutdowns. Three you might be pushing your luck, and doing 4 you definately need to shutdown, so you may as well get some pratcise in. Getting the shutdowns means the fight goes a lot quicker as well leaving you more time for working toward other hardmodes and Yogg!
Subscribe to:
Posts (Atom)
