Also known as I choose you, Steelbreaker (25) or Iron Council. I present the Achievement Awarding Strat!
Shopping list
2 tanks
1 OT/DPS
6 healers (at least 1 druid - they are ridiculous good in this fight)
all the DPS you can poke a stick at.
Tanking
Setting up the pull is important, and how you tank steelbreaker is also important. I will come to that in a moment.
When you pull the 3 bosses you need to separate them in a very specific way to deal with their abilities.
Tanking Middle Size Guy
First up is middle size guy. Move him on top of steelbreaker to take advantage of probability of the blue runes. No magic there, just burn him down. Move mobs out of the blue stuff, move yourselves into the blue stuff and go hard - blow your 2 min CDs.
Tanking Lil' Guy
Move this guy off to the right (or left - just decide before hand). This guy is tanked by the OT/DPS tank as he is the easiest to tank, and gets the OT into DPSing for Steelbreaker. This guy needs interrupts. We have often have a DPS warrior with sword and board tanking him to help out with this. Or get a lock to pop his felhunter on this guy to help. Pets do seem to be bugged at the moment, so if you are the lock with the pet, make sure you have set your pet correctly before engaging in the fight. This is more important than DPSing.
P1
Now, the position of this guy relative to steelbreaker is important. You need to move him as close to the steelbreaker tank as possible, without the steelbreaker tank getting copped by the AoE. You need to make sure your Steelbreaker tank knows where you are so they can position correctly toward the end of phase 1.
P2
All the Melee attack from as close to steelbreaker as they can to try to minimise the chances they get the debuff, more on that later. Burn this boss and run to steelbreaker when melee have to run out. Also, all ranged and healers should be stacking on steelbreaker, and healers should start autoattacking steelbreaker to help with mana issues later on. The debuff soakers need to move out to range of steelbreaker, but still in range of middle guy. Toward the end of P2, they will need to move into their P3 soaker positions (which may be out of range of middle guy)
Tanking Steelbreaker
He gets tanked in the middle. We use a pally because they can self dispel. If you don't have that luxury, make sure you have someone allocated to dispelling fusion punch as soon as it is applied every time.
P1
Tank on top of middle sized guy, move steelbreaker out of blue runes and stay on top of the middle sized guy. This is really important to do as it drastically reduces the time required to kill middle sized guy, and there is more mana all around for healers and DPSers for Phase 3. At the end of P1, start to move steelbreaker into position 20 yards from lil' guy, ready for debuff soakers to do their thing.
P2
Tank him, don't die.
P3
Ok, this is the fun part. You should have a full raid alive at this point or you wont make the soft enrage (ie 3 tank deaths which is 2 mins)
Tank pong is where this is headed. Steelbreaker pops on a debuff on the current target which after 30s makes you EXPLODE and kill everyone in range. So, watch that debuff, and at 10s call out, your other tank should be ready to taunt at about 5s. Get a soulstone put on you, or have a druid at the ready, because once you explode you need to get back alive as soon as possible so you can be rebuffed ready to tank in 20s. And believe me, that is not a lot of time to prepare! Get up ASAP!
The second tank blows a short CD to help the healers when he taunts and tanks now for 25s then explodes. Tank one takes over. Tank 2 is SSed or brezzed and rebuffed.
Tank 1 is now going to be hit REALLY hard. Start blowing all your CDs to stay alive for that 25s starting from your taunt - that first hit is a doozy, and healers will be frantic. Stay alive (until you have to die).
Tank 2 has the same deal but has to deal with EVEN MORE damage. So your best mitigating tank needs to be tank 2. Blow everything you have to stay alive, healers will be pretty oom by now so help as much as you can and DPS really need to burn like your house is on fire.
Ensure you have a dispeller allocated to dispel fusion punch properly. We use a pally tank to tank steelbreaker all the way through because they can dispel themselves, however after they DIE you need to make sure someone is ready to step up and take over for the second tank (and again when the pally tank is dead the second time)
--
That's the tanking positioning.
Healers simply plonk themselves slap bang in the middle of the room and heal their brains out.
Ranged DPS follow the runes in P1, and go join the healers in P2/3.
Melee DPS follow the runes in P1, jump on middle guy from as close to steelbreaker as they possibly can in P2 and in the middle in P3.
Here is more interesting-ness you need to deal with.
DPS requirements
Maths says everyone needs to be pulling an average of 7k dps each for P3 (not overall, just P3) to kill steelbreaker within 2 mins. Realistically, you need people pulling more to cover the people pulling less (ie healer offspecs and the buff tankers, see below). However, this is very achievable with a heroism, blowing all CDs and haste pots. We recommend you wait to use your heroism until all DPS have had time to put up all their debuffs on the boss.
Here's a handy tip: Have the DPS that do debuffs switch early onto steelbreaker (about 5% left on little guy) so that everything is set up and ready as soon as little guy dies and you can blow all your cooldowns and heroism straight away.
In phase 3, you will need to have a rogue with Wound Poison or a hunter with Aimed Shot up on the boss at all times. This reduces the amount he heals every time a tank dies! Which is really important and can make the difference between a wipe and a kill!
Debuff tanking
From P2 onwards, Steelbreaker drops an electrical debuff on a random ranged (and by ranged I mean ranged to STEELBREAKER) player that hurts a lot. It lasts 20s and he casts it every 20ish seconds and YES IT STACKS! 2 stacks on one player can mean WIPETASTICNESS (17k ticks with the second tank death and 2 stacks) if you are not aware or if your healers are close to oom (which they guaranteed will be)
Since hunters HAVE to be at range to hit stuff, they usually get the job of tanking the debuff. Yay? Not so much. Make sure all hunters have nature resist going on, either aura, or flasks or totem. The totem is preferred as it impacts DPS the least.
SPriests, it seems, can mitigate the debuff by up to 25%. First of all they have shadowform but they can also spec into Spell Warding which reduces another 10%. Spell warding is a tier 2 holy spell, so SPriests would have to specifically spec into it for this fight. Now, that might not be doable for some guilds, but I am fairly certain that most people are dual specced these days, and if you knew up front you were doing this fight, you could sort out a second shadow spec to cover it off. SO! 25% reduction, plus a nature resist aura/totem is certainly wonderful for this. However, spell warding spec can drastically reduce an SPriest's DPS. Be mindful of this should you chose to use it.
Now, you have 3 or 4 team members that can tank the debuff. Get them to spread out (so they dont damage each other, 15 yards apart. DBM's /range function is invaluable here). They simply stand out there and DPS from afar. Having 3 or 4 people is playing the numbers game. It is fairly unlikely they will cop 2 debuffs, but if they do, they need to cry out and the healers need to cover that of VERY quickly. It is healable through if you have resto druids and disc priests. If your soaker has 2 debuffs, load them up with hots and bubble the begeebers out of them. But, as always, prevention is better than a cure. Make sure your soaker team is in place at the end of P2 and starting their rotation at that point.
Healing
This is the hardest part of the fight, getting the healing right.
With 6 healers there is not a lot of wiggle room, and certainly no room for error. You need to have 3 MHs and probably 3 raid healers. But again, your mileage may vary. You may have to reduce your healing team to 5 if you are struggling with DPS. But, there is no point practising this boss if you cant keep everyone alive.
P1
One MH per tank, and steelbreaker tank gets 2. Be in position EARLY so you can plant and start healing just before the bosses get to the tanks - the most dangerous part of the fight is right at the beginning. Be careful.
P2
The next most dangerous part of the fight is changeovers as bosses die - watch the boss health, and when you get to about 5% be ready to change your target, move and prep early rather than later. Each boss death ups their damage output, so be aware of that and be ready.
Healer on the first tank moves off onto steelbreaker, and 2 healers on the raid, including one to start looking after the debuffs. Pally bacon really shines at this point for MT healing. Use it liberally.
P3
Again, prep early, watch the boss health in P2 and be ready for the changeover to P3. Each taunt is dangerous, load up the new tank with hots and be ready with a big heal - dont forget, the tanks now have significantly less buffs on them due to being dead and at the SAME TIME Steelbreaker will be hitting harder. Be Prepared, boyscouts!
All heals on the MT, and 2 healers on the raid, one healer only on the debuffs. Here, again, your mileage may vary depending on your healers ability, but that should approximately get you through.
Mana is a big issue, you will be riding oom by probably half way through steelbreaker, so save your mana pots and tricks for P3, try and conserve mana throughout P1 and 2. If you have mana regeneration CDs, use them early if they are on a 2-3min CD so you get 2 uses of them in the fight. Also, autohit the boss - you will be in melee range, not only will you heal yourself from JoL and LotP, but you will likely get mana back from a JoW. This is important.
Allocate "oh shits" to the tanks. Guardian Spirit, Pain Suppression, Hand Of Sanctuary. Get the Tanks to use CDs and call for these as they need them. For example, the way we set them up is as follows:
Tank 1; Personal CDs -> tank 2 taunt
Tank 2; Personal CDs->Tank 1 rezzed->Oh shit 1 on tank 1->Tank 1 taunt
Tank 1; Personal CDs, calls for oh shit 2 -> Tank 2 rezzed -> Oh shit 3 on Tank 2 (Steelbreaker dead yet?)-> Taunt
Tank 2; Personal CDs, calls for oh shit 4 Steelbreaker dead.
--
How do you know if you are going to get steelbreaker down in time?
A good rule of thumb for this fight is being able to get steelbreaker in the low 40 percents before the first tank change. If you are not getting him AT LEAST below 50% chances are your DPS will be slow - because your hero will have run out by this point.
Think of it like this:
Steelbreaker has effectively 120% health.
Tank 1 - remove 55% (boss on 45%) with hero
Tank 2 (boss up to 55%) - remove 35% (boss 20%)
Tank 1a (boss up to 30%) - remove 30% (boss dead)
That is what you are aiming for. With ToC gear coming out, this will be much more accessible to everyone. The loot drops are still fantastic and the sense of satisfaction from killing the boss is second to none!
Good Luck!
Showing posts with label Strat25. Show all posts
Showing posts with label Strat25. Show all posts
Thursday, August 20, 2009


Friday, July 31, 2009
Assembly of Iron and other hardmode updates
I have fleshed out Iron council with some more details about the soakers and also about tank taunting.
The link is over there to the right. Hope the update helps! We are very close to getting this down, and we simply need to practise the tank cutovers and up our DPS a bit.
I have also gone over a few of the hardmode pages and updated them with a few more useful details and changes we have made as we tweak things.
The link is over there to the right. Hope the update helps! We are very close to getting this down, and we simply need to practise the tank cutovers and up our DPS a bit.
I have also gone over a few of the hardmode pages and updated them with a few more useful details and changes we have made as we tweak things.
Thursday, July 9, 2009
Hodir Hard Mode Strategy
Random Hodir is Random. And hodir is certainly not as easy as all the strat sites make out it is.
The two main issues are tank threat and DPS. Maximising your use of all the buffs, and making sure your tank can hold threat once you do get that right.
So here is the collection of information I have found trawling the intertubes. For some reason, there seems to not be a place where it is all collated - so I hope this comes up high in the search engines.
Shopping list:
1 tank (no Frost resist gear required)
3-4 healers
20ish of your awesomest DPS (which is probably your entire group!)
some kind of frost resist buff/aura/totem
Boss position: There are 2 schools of thought to this, hold hodir near the rare cache (so the adds gravitate to the middle, making them easier to bust out) or Tank hodir in the middle (and move him around a bit to keep melee with starlights as much as possible). We found that we are getting better DPS keeping hodir in the middle, but your mileage may vary. Both positions are valid.
Movement: This is a high movement fight. The reason for this is you cant get your stacking debuff go more than 2 stacks (or the healers cant keep up), you need to get into starlights and also be near toasty fires and get out of the way of falling snow. Tanks need to try and keep hodir as stable as possible, especially if tanking in the middle as it is VERY possible to move hodir accidentally into melee range and suddenly the mage sitting safely on 120% threat is oneshot (as melee range is 110% threat and you pull, as opposed to 130% for ranged)
Releasing Adds: Everyone releases adds as we engage Hodir. We mark up the mages and the shamans and release them first. The second time, we allocate a team of ranged and melee to get the adds out. Generally, these are the most bursty classes generally hunters and paladins. The last time, we only get out the mages and shamans to get back onto hodir asap.
Toasty fires and the Singed debuff: this stacks 25 times and then only requires 1 hit every 25s I think to keep it up. Explosive shot has 4 chances to replenish the stack for each shot, so probably should be included as much as possible in a rotation. Keeping this up is vital to killing hodir in 3 mins. For those people for whom movement is an issue (channelers or those with longish cast times as part of their main rotations) you need to get yourselves to a toasty fire as soon as you can.
Starlight: For those that value haste, this is probably a priority for you to get into.
Storm: There are reasons this should be in the ranged - the main one is that all the other buffs stack stupidly well together. Ranged are more free to move around than melee are and are able to get all 3 buffs at once (and should be actively seeking to do so). Singed also will benefit more from storm. The long and the short of it is, allocate your biggest ranged DPS (in this case, generally mages and warlocks) into a group of about 5 or 6 and mark them up. Everyone should be taking the storm buff to that group as soon as possible. Yes, it is possible for mages to crack 20k dps if all the planets align. I nearly fell over when I saw it with my own eyes!
Tank threat: This is a big problem due to the nature of the DPS requirement (to deliver 32.5 million damage in 180s by 20 people each person needs to AVERAGE just a smidge over 9k dps). Obviously, you need to have threat gear on. Pally's can benefit from the 25 stack, warriors have vigilance, DKs have their AM shield to help with frozen blows, and I have not yet read an account of a bear MTing hard mode. We use a Pally Tank and that seems to work the best.
But even then, threat is often an issue. 1 solution is getting the storm buff to the tank... but this gimps raid DPS. The best, but most delicate, solution is get a ranged to pull threat, taunt off them then get the ranged to aggro dump (ie hunters FD, mages invis, hand of salv, sould shatter etc etc). Doing this once or twice will make sure that firstly the ranged are not actually holding back (very important) and secondly the tank will build threat faster than they normally could. We use this to great effect.
When any of the ranged DPS in the marked group starts to get close, they call out that they are going to go for a threat pull. Our Pally tank then watches and waits for Hodir to change aggro and immediately taunts back, and gets the benefit of the extra aggro. This will take a bit of practise and some clear calls over your VoIP of choice. But it is the single most effective way of dealing with the threat issue we have found.
Cooldowns and heroism: This is best not blown at the start. You want the best possible moment to do all of this and it requires a few things to set up. You need the tank to be ready with good threat, and his taunt OFF CD (just in case). You want that singed stack to be at 25. You want frozen blows to be done, and you want a good number of fires, starlights and the storm buff to be in a good place. You want the full 40s of heroism to be used. This is best achieved AFTER the first flash freeze. Call heroism and save your CDs for this.
Flash freeze: Never get caught in it. Duh.
Frozen blows: There should really only be 2 frozen blows during this fight. A ret pally can use DS in conjunction with bubble if you have a low performing pally (ie a holy pally in offspec is a good example, like ME!). The other one should be covered off by a healer. Divine hymn should account for it exactly like in XT hard mode.
Healer makeup: you can pretty much take whatever you want, but Pallies should be last on your list due to their very static nature and lack of AoE heals. You want your best AoE healers and one kinda sorta MT healer. 4 at the most.
DPS makeup: Ranged heavy is preferred.
I think that is all the relevant information. Making it all happen smoothly is not as easy as people seem to be making out on the strategy sites! ARGH! I hate that!!
Making sense of the information
The way we managed to get this done was as follows:
Prot pally Tank (taunting when necessary)
Tank Hodir in the middle
6 top hitting ranged to stack up and stay on boss and be marked for all storm buffs
All other ranged spread out
1 group (hunters/ret pallies - but a team of 6 burtsy players not in the big hitter group) allocated to add extraction
Explosive shot to maintain singed.
Found that an ele shammy helped a stupid amount with DPS even if undergeared or an alt/offspec.
There will be a lot of sacrificing goats to the RNG gods, and for a long time you will find that your goats are not very pleasing. Don't lose heart! If you are close to the line one attempt might be 10% and the next might be a 40% simply based on where your fires, and beams and storms end up! Just keep practising getting that storm buff to the ranged group and getting adds out as fast as possible. Eventually, you will all get it right and hodir will die.
This is a very difficult strat to explain - if you have any ideas or require clarification please comment!
The two main issues are tank threat and DPS. Maximising your use of all the buffs, and making sure your tank can hold threat once you do get that right.
So here is the collection of information I have found trawling the intertubes. For some reason, there seems to not be a place where it is all collated - so I hope this comes up high in the search engines.
Shopping list:
1 tank (no Frost resist gear required)
3-4 healers
20ish of your awesomest DPS (which is probably your entire group!)
some kind of frost resist buff/aura/totem
Boss position: There are 2 schools of thought to this, hold hodir near the rare cache (so the adds gravitate to the middle, making them easier to bust out) or Tank hodir in the middle (and move him around a bit to keep melee with starlights as much as possible). We found that we are getting better DPS keeping hodir in the middle, but your mileage may vary. Both positions are valid.
Movement: This is a high movement fight. The reason for this is you cant get your stacking debuff go more than 2 stacks (or the healers cant keep up), you need to get into starlights and also be near toasty fires and get out of the way of falling snow. Tanks need to try and keep hodir as stable as possible, especially if tanking in the middle as it is VERY possible to move hodir accidentally into melee range and suddenly the mage sitting safely on 120% threat is oneshot (as melee range is 110% threat and you pull, as opposed to 130% for ranged)
Releasing Adds: Everyone releases adds as we engage Hodir. We mark up the mages and the shamans and release them first. The second time, we allocate a team of ranged and melee to get the adds out. Generally, these are the most bursty classes generally hunters and paladins. The last time, we only get out the mages and shamans to get back onto hodir asap.
Toasty fires and the Singed debuff: this stacks 25 times and then only requires 1 hit every 25s I think to keep it up. Explosive shot has 4 chances to replenish the stack for each shot, so probably should be included as much as possible in a rotation. Keeping this up is vital to killing hodir in 3 mins. For those people for whom movement is an issue (channelers or those with longish cast times as part of their main rotations) you need to get yourselves to a toasty fire as soon as you can.
Starlight: For those that value haste, this is probably a priority for you to get into.
Storm: There are reasons this should be in the ranged - the main one is that all the other buffs stack stupidly well together. Ranged are more free to move around than melee are and are able to get all 3 buffs at once (and should be actively seeking to do so). Singed also will benefit more from storm. The long and the short of it is, allocate your biggest ranged DPS (in this case, generally mages and warlocks) into a group of about 5 or 6 and mark them up. Everyone should be taking the storm buff to that group as soon as possible. Yes, it is possible for mages to crack 20k dps if all the planets align. I nearly fell over when I saw it with my own eyes!
Tank threat: This is a big problem due to the nature of the DPS requirement (to deliver 32.5 million damage in 180s by 20 people each person needs to AVERAGE just a smidge over 9k dps). Obviously, you need to have threat gear on. Pally's can benefit from the 25 stack, warriors have vigilance, DKs have their AM shield to help with frozen blows, and I have not yet read an account of a bear MTing hard mode. We use a Pally Tank and that seems to work the best.
But even then, threat is often an issue. 1 solution is getting the storm buff to the tank... but this gimps raid DPS. The best, but most delicate, solution is get a ranged to pull threat, taunt off them then get the ranged to aggro dump (ie hunters FD, mages invis, hand of salv, sould shatter etc etc). Doing this once or twice will make sure that firstly the ranged are not actually holding back (very important) and secondly the tank will build threat faster than they normally could. We use this to great effect.
When any of the ranged DPS in the marked group starts to get close, they call out that they are going to go for a threat pull. Our Pally tank then watches and waits for Hodir to change aggro and immediately taunts back, and gets the benefit of the extra aggro. This will take a bit of practise and some clear calls over your VoIP of choice. But it is the single most effective way of dealing with the threat issue we have found.
Cooldowns and heroism: This is best not blown at the start. You want the best possible moment to do all of this and it requires a few things to set up. You need the tank to be ready with good threat, and his taunt OFF CD (just in case). You want that singed stack to be at 25. You want frozen blows to be done, and you want a good number of fires, starlights and the storm buff to be in a good place. You want the full 40s of heroism to be used. This is best achieved AFTER the first flash freeze. Call heroism and save your CDs for this.
Flash freeze: Never get caught in it. Duh.
Frozen blows: There should really only be 2 frozen blows during this fight. A ret pally can use DS in conjunction with bubble if you have a low performing pally (ie a holy pally in offspec is a good example, like ME!). The other one should be covered off by a healer. Divine hymn should account for it exactly like in XT hard mode.
Healer makeup: you can pretty much take whatever you want, but Pallies should be last on your list due to their very static nature and lack of AoE heals. You want your best AoE healers and one kinda sorta MT healer. 4 at the most.
DPS makeup: Ranged heavy is preferred.
I think that is all the relevant information. Making it all happen smoothly is not as easy as people seem to be making out on the strategy sites! ARGH! I hate that!!
Making sense of the information
The way we managed to get this done was as follows:
Prot pally Tank (taunting when necessary)
Tank Hodir in the middle
6 top hitting ranged to stack up and stay on boss and be marked for all storm buffs
All other ranged spread out
1 group (hunters/ret pallies - but a team of 6 burtsy players not in the big hitter group) allocated to add extraction
Explosive shot to maintain singed.
Found that an ele shammy helped a stupid amount with DPS even if undergeared or an alt/offspec.
There will be a lot of sacrificing goats to the RNG gods, and for a long time you will find that your goats are not very pleasing. Don't lose heart! If you are close to the line one attempt might be 10% and the next might be a 40% simply based on where your fires, and beams and storms end up! Just keep practising getting that storm buff to the ranged group and getting adds out as fast as possible. Eventually, you will all get it right and hodir will die.
This is a very difficult strat to explain - if you have any ideas or require clarification please comment!
Friday, June 19, 2009
XT-002 Heroic: Heartbreaker
Ok So I managed to completely lose my previous strat here, so I will be rewriting this from scratch (which probably needed doing anyway)
Shopping list:
1MT
1DPS/OT
6 healers
Some serious DPS.
Set up the same way as explained in the Normal mode strat. To jog your memory, tank XT in the middle, Turn him away from the raid, melee on the left arse cheek, ranged and healers stacked a small ways behind them. Light is right and go hard to get XT to 75% as soon as possible!
Heartbreaker!
To activate this hardmode, all you have to do it kill the heart before the timer runs out. Pfft easy, right? WRONG! This means popping anything and you have at your disposal to increase DPS. Get rogues using expose armour as it is faster to apply than sunders. Get your healers DPSing as well (there is no raid damage at this time). Go ballistic, get out the whips and smash/smoosh that thing into the ground.
A useful thing to know if you are very close to activating hardmode: Dots keep ticking on the heart even when it has gone back up! So load it up. Hardmode can activate several seconds AFTER the heart has gone back up into the body. So, don't give up on hardmode until you get a second heart phase!
Ok, so we smashed the heart, now what?
Lucky for you the adds will stop spawning. But things will get harder. XT resets to 160% health (ouch) and you have about 2 min less on the enrage timer! Time to pull out the best DPS you can muster. Keep moving left and right, but now there is extra added bonus things that the gravity and light do!
/tar life /DPS!
Your first light on some one is going to do something funky, and the reason you are running to the right leg will now become apparent. Make sure you are in line of sight of the tank. When the light thingy drops off, a new annoying thing called a Life Spark will start hitting you like a mack truck if you don't move quick back to your group. The MT needs to quickly taunt this life spark away from anyone else and tank it. Healers need to be on their game and aware of the extra damage, and all ranged DPS need to smash that life spark down as quickly as possible and get back onto DPSing XT as soon as they can. If a ranged gets aggro on the spark to early, they may need to kite it around until dead. Obviously, this is not ideal, but it happens sometimes if the person is accidentally too far away from the tank to taunt.
Black goo?
So, you are running left with gravity bomb, you stay out there until it drops off and suddenly, there is a big pool of black goo surrounding you! RUN OUT!! RUN OUT! So, now with gravity bombs you have to move to a position to drop your goo away from everyone else! Which makes it a fair bit harder to manage.
The shopping list mentions a DPS/OT?
Yes it does! Make sure there is a plate wearer who can grab the big trash (if any happen to spawn) and just hang onto them until the MT is ready to taunt them himself.
Tympanic Tantrum
Tympanic tantrum is a lot more deadly in hardmode, it actually almost does enough damage to kill someone. If they happen to be not topped up, or have a light/grav thingy on them, they may well die if you are not on top of heals. Ret/Prot paladins with Divine Sacrifice can help out here if you are struggling, and so can priests with their 8s "HEAL EVERYONE" ability. Organise a rotation ahead of time to help out.
Is that really all?
Yeah pretty much! The tanks need to be very fast on picking up the sparks, DPS have to be uber-elite and smash those life sparks as soon as they can. The main trick here is to not make a mistake. Like all the hardmodes in ulduar, this is about perfection! Make it perfect, and XT will die with a broken heart. Aw.
Shopping list:
1MT
1DPS/OT
6 healers
Some serious DPS.
Set up the same way as explained in the Normal mode strat. To jog your memory, tank XT in the middle, Turn him away from the raid, melee on the left arse cheek, ranged and healers stacked a small ways behind them. Light is right and go hard to get XT to 75% as soon as possible!
Heartbreaker!
To activate this hardmode, all you have to do it kill the heart before the timer runs out. Pfft easy, right? WRONG! This means popping anything and you have at your disposal to increase DPS. Get rogues using expose armour as it is faster to apply than sunders. Get your healers DPSing as well (there is no raid damage at this time). Go ballistic, get out the whips and smash/smoosh that thing into the ground.
A useful thing to know if you are very close to activating hardmode: Dots keep ticking on the heart even when it has gone back up! So load it up. Hardmode can activate several seconds AFTER the heart has gone back up into the body. So, don't give up on hardmode until you get a second heart phase!
Ok, so we smashed the heart, now what?
Lucky for you the adds will stop spawning. But things will get harder. XT resets to 160% health (ouch) and you have about 2 min less on the enrage timer! Time to pull out the best DPS you can muster. Keep moving left and right, but now there is extra added bonus things that the gravity and light do!
/tar life /DPS!
Your first light on some one is going to do something funky, and the reason you are running to the right leg will now become apparent. Make sure you are in line of sight of the tank. When the light thingy drops off, a new annoying thing called a Life Spark will start hitting you like a mack truck if you don't move quick back to your group. The MT needs to quickly taunt this life spark away from anyone else and tank it. Healers need to be on their game and aware of the extra damage, and all ranged DPS need to smash that life spark down as quickly as possible and get back onto DPSing XT as soon as they can. If a ranged gets aggro on the spark to early, they may need to kite it around until dead. Obviously, this is not ideal, but it happens sometimes if the person is accidentally too far away from the tank to taunt.
Black goo?
So, you are running left with gravity bomb, you stay out there until it drops off and suddenly, there is a big pool of black goo surrounding you! RUN OUT!! RUN OUT! So, now with gravity bombs you have to move to a position to drop your goo away from everyone else! Which makes it a fair bit harder to manage.
The shopping list mentions a DPS/OT?
Yes it does! Make sure there is a plate wearer who can grab the big trash (if any happen to spawn) and just hang onto them until the MT is ready to taunt them himself.
Tympanic Tantrum
Tympanic tantrum is a lot more deadly in hardmode, it actually almost does enough damage to kill someone. If they happen to be not topped up, or have a light/grav thingy on them, they may well die if you are not on top of heals. Ret/Prot paladins with Divine Sacrifice can help out here if you are struggling, and so can priests with their 8s "HEAL EVERYONE" ability. Organise a rotation ahead of time to help out.
Is that really all?
Yeah pretty much! The tanks need to be very fast on picking up the sparks, DPS have to be uber-elite and smash those life sparks as soon as they can. The main trick here is to not make a mistake. Like all the hardmodes in ulduar, this is about perfection! Make it perfect, and XT will die with a broken heart. Aw.
Thursday, June 18, 2009
That was AWESOME! - Flame Leviathan with 4 towers (AKA Hard Mode)
I had the best fun raiding last night in some time. Last night even beat Monday's Yogg kill. What was last night? It was FLAME LEVIATHAN with 4 TOWERS! It was fun, it was controlled chaos (in many cases just chaos) it was wipetastic.
A few useful things to know:
If your armour is at 0% durability, the vehicles dont care, you still get the bonus as if you were 100% durability. So save money and don't repair.
Pyrite is a rare commodity. Use it at all opportunities!
Anyway onto the strat. We set up ourselves and ran very similar to the tankspot strat and I recommend you have a look at that to familiarise yourself with this. I also recommend doing 2 or 3 towers first to practise your throwing of people onto FL and getting shutouts, as this is vital to the success of the fight.
Shopping list as per tankspot:
4 Choppers
4 Siege Engines
3 Demolishers with 2 Shut down teams ready to roll
2 Demolishers on pure DPS (have best geared players as drivers)
OK, I will write up the tips in sections, some might overlap, but I hope that it will give you 2 or 3 perspectives on the fight.
First and foremost - DON'T PANIC! There is Stuff going everywhere, beams, and fires, and smoke and rockets, and adds and not to mention FL himself as well as the pyrite! It really looks insane out there, but if you stick to your job, and don't be a hero, everyone will be fine.
Second and almost as foremost - stay alive. If you stay alive (even if your stacks drop off the boss or you get stuck behind some fire) you can keep fighting. You just cant do your job dead. This fight shows you the meaning of that more than others.
Third and pretty darn important - do your job. Don't be a hero and try to DPS the boss if you are a siege passenger. Your job is not to do that, and you will find that you will fail if even one person doesn't stick to the plan.
Vehicle jobs:
Siege engines drivers - your job is to interrupt Flame Vents, light tar and smash adds. You also need to not stand in any beams or fires. This is actually harder than it sounds. Tips on that in the adds section. The drivers should have decent gear.
Siege Engine Passengers - you guys are not there to DPS the boss. Your job is to get down pyrite, light tar, and kill adds oh and rescue anyone who got ice blocked. Believe me, these jobs are really important, as the demolisher teams will desperately need you to be keeping the adds off them and refueling their pyrite.
Choppers - you want your choppers to have over 800k each or they will die to unavoidable aoe by the end of the fight. These guys drop tar and ferry the shut down team back to their demolisher after they get spat out. Mark up the choppers and allocate them a demolisher (and hence 2 members of teams) to ferry. This is not as easy as it sounds.
Demolisher drivers (DPS) - mashing 2 is your job. You need to keep that pyrite debuff up at 10 as much as you can. You need to do this while not standing in beams and fires, and while being close enough to FL to hit him, and yet close enough to pyrite to restock. The debuff needs to be refreshed with a pyrite hit every 10s to keep the stack up. That gives you a bit of time to move around if you need. Talk to your passenger for speed hits.
Demolisher passengers (DPS) - shoot down pyrite, collect pyrite (write a pyrite targeting macro, it helps something like /tar pyrite) and keep your demolisher stocked. You are supplying the main source of DPS for FL. It is vital you talk to your driver and guide them as the driver cant see where the pyrite is always. We found grabbing pyrite at about 60% kept the stocks put at 100% most of the time with no losses (as by the time you grab the pyrite, chain it in, and tip it into the tank, the driver has used about 10-20%)
Demolisher driver (shutdown) - you have the shutdown team on board, so your DPS will be lower. Try as best you can to keep up 10 stacks on FL, but it is likely it will often drop off or you might run out of pyrite. Be aware of where your chopper is, and during a shutdown ensure you collect your passenger safely as a priority. You are also in charge of flinging them up. Aim your shooter OVER the head of FL, and as long as you get within cooee FL will actually chain them in. You also need to behave like a DPS driver. So read up on that.
Demolisher Passenger (shutdown) - there are 2 teams of you. When you hop in the passenger seat, the second guy cant get in. But you can hold 3 people when one passenger loads themselves up in the cannon, so it is a 2 stage process. THIS IS REALLY IMPORTANT TO UNDERSTAND. You will get launched as soon as FL is out of shutdown. Get up on top and do your job. When you are flung off, get onto your chopper asap. The chopper will get you to your demolisher where the other passenger should now be loaded into the cannon ready for the next shut down. You can jump stright from the chopper to the demolisher (no you do NOT have to dismount first!) and sit in the passenger seat. Wait for the driver to fling the second team up and now your job is that of the DPS demolisher passenger - PYRITE PYRITE PYRITE! When the next shut down occurs, keep your demolisher stacked, keep an eye on your chopper, and when they are getting near, load yourself up so the other team can climb on board. Rinse, repeat.
Shutdowns
Read the FL 2 towers for how shutdowns work and why they are so important. This time, instead of 1 team, there are 2 rotating teams as explained in Demo passenger (shutdown). The first shutdown, throw up 4 people so that first shutdown is as past as possible, we also use heroism. Our teams were as follows:
Shutdown 1 - Ele shammy (OH+Hero), Lock, lock, ret pally. The ret pally had a special task to smash a tower and bubble when they hit the ground and run themselves back to their demolisher (I was the demo driver in this case). We called where I was going to be, and I moved to pick my passenger up. No chopper ferry required. But a non repeatable occurrence.
Shutdown 2 - Mage Mage Boomkin (OH)
Shutdown 3 - Ele Shammy (OH) Lock Lock etc
All shutout team members were marked up, as were the demos. Choppers were watching carefully where their demos were and where their passengers were. Demos were doing the same if possible.
I cannot express how important getting the shutouts right is. You will need 3 or 4 shutouts to kill FL, but as you get better that number will reduce (2 is the lowest I have heard of)
The Towers
Mimiron - big diagonal lines of fire. This is a pain because the fire is generally where the pyrite drops. Simply avoid the fire and you will be fine.
Hodir - beams that iceblock you. Possibly the most annoying tower defense. These whiteish beams randomly wander around the field, at some point they will slow right down and follow you in a straight line for about 5s, they then stop and drop ice from the sky (hodir is nothing but original) flash freezing anyone within about 10 or 15 yards of it (yes, you can be frozen and NOT be in the beam - its aoe). Simply ignore the beams until you see them lock on then move directly forward or backward until you see them stop and they start moving randomly again. You are now safe. DO NOT TURN, just straight forward or back is sufficient to get out of the aoe burst.
Thorim - his hammer is a pain, a whole heap of AoE damage that is virtually unavoidable and docks about 1/3 your health. Siege engines save your shields for this. Demos and choppers... sorry, it means you have to be more careful about casual damage from screw ups! At all times try to stay out of the blue beams crackling with electricity, they hurt.
Freya - lasher adds, big and small. You can kite the adds into tar, or hope that someone is paying attention and kill them. One pyrite throw clears out a LOT of adds, and is occasionally worth it. Otherwise, siege passengers and demo passengers need to keep on top of them.
The pull
Before the pull we spend a goodly amount of time cluttering the field with pyrite so the demos can park themselves early on and let loose while there are fewer towers running. Demos launching people get in range and get ready to launch. The one demo NOT launching someone starts the pull, and BAM its on for young and old.
The fight
Stay alive, if that means dropping your stack of 10 then do so. Avoid AoE as much as you can. This fight is about staying alive, and doing your job. Don't be a hero, please! If everyone executes their jobs perfectly this becomes an amazingly smooth ride. Enjoy it, FL is, in my opinion, the best fight in the entire instance.
A few useful things to know:
If your armour is at 0% durability, the vehicles dont care, you still get the bonus as if you were 100% durability. So save money and don't repair.
Pyrite is a rare commodity. Use it at all opportunities!
Anyway onto the strat. We set up ourselves and ran very similar to the tankspot strat and I recommend you have a look at that to familiarise yourself with this. I also recommend doing 2 or 3 towers first to practise your throwing of people onto FL and getting shutouts, as this is vital to the success of the fight.
Shopping list as per tankspot:
4 Choppers
4 Siege Engines
3 Demolishers with 2 Shut down teams ready to roll
2 Demolishers on pure DPS (have best geared players as drivers)
OK, I will write up the tips in sections, some might overlap, but I hope that it will give you 2 or 3 perspectives on the fight.
First and foremost - DON'T PANIC! There is Stuff going everywhere, beams, and fires, and smoke and rockets, and adds and not to mention FL himself as well as the pyrite! It really looks insane out there, but if you stick to your job, and don't be a hero, everyone will be fine.
Second and almost as foremost - stay alive. If you stay alive (even if your stacks drop off the boss or you get stuck behind some fire) you can keep fighting. You just cant do your job dead. This fight shows you the meaning of that more than others.
Third and pretty darn important - do your job. Don't be a hero and try to DPS the boss if you are a siege passenger. Your job is not to do that, and you will find that you will fail if even one person doesn't stick to the plan.
Vehicle jobs:
Siege engines drivers - your job is to interrupt Flame Vents, light tar and smash adds. You also need to not stand in any beams or fires. This is actually harder than it sounds. Tips on that in the adds section. The drivers should have decent gear.
Siege Engine Passengers - you guys are not there to DPS the boss. Your job is to get down pyrite, light tar, and kill adds oh and rescue anyone who got ice blocked. Believe me, these jobs are really important, as the demolisher teams will desperately need you to be keeping the adds off them and refueling their pyrite.
Choppers - you want your choppers to have over 800k each or they will die to unavoidable aoe by the end of the fight. These guys drop tar and ferry the shut down team back to their demolisher after they get spat out. Mark up the choppers and allocate them a demolisher (and hence 2 members of teams) to ferry. This is not as easy as it sounds.
Demolisher drivers (DPS) - mashing 2 is your job. You need to keep that pyrite debuff up at 10 as much as you can. You need to do this while not standing in beams and fires, and while being close enough to FL to hit him, and yet close enough to pyrite to restock. The debuff needs to be refreshed with a pyrite hit every 10s to keep the stack up. That gives you a bit of time to move around if you need. Talk to your passenger for speed hits.
Demolisher passengers (DPS) - shoot down pyrite, collect pyrite (write a pyrite targeting macro, it helps something like /tar pyrite) and keep your demolisher stocked. You are supplying the main source of DPS for FL. It is vital you talk to your driver and guide them as the driver cant see where the pyrite is always. We found grabbing pyrite at about 60% kept the stocks put at 100% most of the time with no losses (as by the time you grab the pyrite, chain it in, and tip it into the tank, the driver has used about 10-20%)
Demolisher driver (shutdown) - you have the shutdown team on board, so your DPS will be lower. Try as best you can to keep up 10 stacks on FL, but it is likely it will often drop off or you might run out of pyrite. Be aware of where your chopper is, and during a shutdown ensure you collect your passenger safely as a priority. You are also in charge of flinging them up. Aim your shooter OVER the head of FL, and as long as you get within cooee FL will actually chain them in. You also need to behave like a DPS driver. So read up on that.
Demolisher Passenger (shutdown) - there are 2 teams of you. When you hop in the passenger seat, the second guy cant get in. But you can hold 3 people when one passenger loads themselves up in the cannon, so it is a 2 stage process. THIS IS REALLY IMPORTANT TO UNDERSTAND. You will get launched as soon as FL is out of shutdown. Get up on top and do your job. When you are flung off, get onto your chopper asap. The chopper will get you to your demolisher where the other passenger should now be loaded into the cannon ready for the next shut down. You can jump stright from the chopper to the demolisher (no you do NOT have to dismount first!) and sit in the passenger seat. Wait for the driver to fling the second team up and now your job is that of the DPS demolisher passenger - PYRITE PYRITE PYRITE! When the next shut down occurs, keep your demolisher stacked, keep an eye on your chopper, and when they are getting near, load yourself up so the other team can climb on board. Rinse, repeat.
Shutdowns
Read the FL 2 towers for how shutdowns work and why they are so important. This time, instead of 1 team, there are 2 rotating teams as explained in Demo passenger (shutdown). The first shutdown, throw up 4 people so that first shutdown is as past as possible, we also use heroism. Our teams were as follows:
Shutdown 1 - Ele shammy (OH+Hero), Lock, lock, ret pally. The ret pally had a special task to smash a tower and bubble when they hit the ground and run themselves back to their demolisher (I was the demo driver in this case). We called where I was going to be, and I moved to pick my passenger up. No chopper ferry required. But a non repeatable occurrence.
Shutdown 2 - Mage Mage Boomkin (OH)
Shutdown 3 - Ele Shammy (OH) Lock Lock etc
All shutout team members were marked up, as were the demos. Choppers were watching carefully where their demos were and where their passengers were. Demos were doing the same if possible.
I cannot express how important getting the shutouts right is. You will need 3 or 4 shutouts to kill FL, but as you get better that number will reduce (2 is the lowest I have heard of)
The Towers
Mimiron - big diagonal lines of fire. This is a pain because the fire is generally where the pyrite drops. Simply avoid the fire and you will be fine.
Hodir - beams that iceblock you. Possibly the most annoying tower defense. These whiteish beams randomly wander around the field, at some point they will slow right down and follow you in a straight line for about 5s, they then stop and drop ice from the sky (hodir is nothing but original) flash freezing anyone within about 10 or 15 yards of it (yes, you can be frozen and NOT be in the beam - its aoe). Simply ignore the beams until you see them lock on then move directly forward or backward until you see them stop and they start moving randomly again. You are now safe. DO NOT TURN, just straight forward or back is sufficient to get out of the aoe burst.
Thorim - his hammer is a pain, a whole heap of AoE damage that is virtually unavoidable and docks about 1/3 your health. Siege engines save your shields for this. Demos and choppers... sorry, it means you have to be more careful about casual damage from screw ups! At all times try to stay out of the blue beams crackling with electricity, they hurt.
Freya - lasher adds, big and small. You can kite the adds into tar, or hope that someone is paying attention and kill them. One pyrite throw clears out a LOT of adds, and is occasionally worth it. Otherwise, siege passengers and demo passengers need to keep on top of them.
The pull
Before the pull we spend a goodly amount of time cluttering the field with pyrite so the demos can park themselves early on and let loose while there are fewer towers running. Demos launching people get in range and get ready to launch. The one demo NOT launching someone starts the pull, and BAM its on for young and old.
The fight
Stay alive, if that means dropping your stack of 10 then do so. Avoid AoE as much as you can. This fight is about staying alive, and doing your job. Don't be a hero, please! If everyone executes their jobs perfectly this becomes an amazingly smooth ride. Enjoy it, FL is, in my opinion, the best fight in the entire instance.
Tuesday, June 16, 2009
Yogg-Saron with 4 watchers (ie not a hard mode)
So, My guild defeated Yogg last night, not in part due to practising on 10 man.
Yogg was recently nerfed (you can look up the changes on the blizzard website) and I dont actually think it will make much of a difference to anyone still working on downing him with 4 watchers. It WILL make a huge difference to the hard modes (not losing as much sanity being the major one). No MCs in Phase 1 doesn't really make a huge difference to the phase, it just removes the RNG from it and causing needless wipes. So, I actually agree with that one. Nerfing the spawn rate I think was unnecessary.
Shopping list:
3 tanks
5 healers
8-9 melee
9-8 ranged
Tips for the fight with 4 watchers. At all times your raid should maintain their own sainty. The green beams give you back 20% per tick.
Phase 1
This was fairly straight forward. We stand near the door to avoid the gas clouds. Tanks ferry the adds to sara. We DPS the adds to about 30% before switching to the next one. We also have about 3 ranged DPS who are capable of dodging clouds nearer the centre to finish off adds that need a hand. We do not spawn an extra add, we dont need to to just kill yogg. Once Sara is dead, split the additional mobs up and smash them down. Healers watch and heal up the explosions.
Key things:
Make sure every add hits Sara. Do not spawn any extra adds. Keep this phase under control and clean up all adds before phase 2.
Phase 2
You must have cleared out all the phase 1 adds before the tentacles appear! Very important.
Melee team
There are 10 portals, East, North and West. Allocate 9 melee and one healer to enter these portals. Allocate groups of 3 to the 3 sides to make it easier. Once someone enters a portal THAT PORTAL VANISHES, so the allocation really does help. If you are having issues, allocate individuals portals, but I hope that would not be necessary.
If a melee gets put in a constrictor on the way to their portal, the other 2 melee must get them out. If by chance that melee is the last one through the portal, and they are nowhere near the ranged team, sorry... wait for a b-rez - that is literally bad luck. The melee need to look after their own.
If a melee gets brainlinked, who ever is brainlinked with the melee MUST go with them to the portals, then return to their own job once the link severs as the melee go in the portal.
This is all about tentacle control. The faster the tentacles are killed in the portals, the less spawn in the main room. Melee are on the clock, do not skip a sinlge tentacle, and smash them as fast as possible. Blow all cooldowns on the first portal phase - and get the yogg brain to about 75%. Dont forget to turn your back to the skulls. This is not as easy as you might think. But with a bit of practise you will learn where the skulls could be (they are randomly placed in the room) and where to stand to minimise their impact. I cant really describe them here, just practise will help. But generally, if you have your back to the room and are facing the tentacles, you will be ok most of the time.
Once the tentacles are all dead, you head into the brain room. Yoggs hitbox is huge so eyeball the exit portal and head toward it as you DPS. There are dangly tentacles which move around and CAN get in the way of you clicking the exit portal and get you insane. Be aware of this and don't nub it up.
When melee get spat back out, they need to clean up all the corruptor tentacles they can possibly find.
When the portal phase comes up again, melee head back in (cleaning up corruptors and constrictors on the way) and this time blow heroism. Again, get to Yogg as soon as possible without missing a tentacle (remember killing tentacles in the portals means less outside) and smash him to about 50%. Pop out, kill corruptors and constrictors.
Third portal, blow any CDs that have come up and get Yogg to 30%. It is imperative that this happen on the third portal phase. Any more and you will run over the timer and probably be overrun with tentacles in phase 3.
Ranged Team
You guys get to stay outside. Mark up the main assist (your best ranged player) with an icon. Ensure that person has the ability to put their own marker back on themselves as DBM will probably remove it if something happens to them like brain link. If possible have a couple of people spamming a macro to mark up the assist. I also recommend reminding people on vent/ts to keep stacking on star (our symbol).
All ranged must stack on star and assist star at all times.
Now, what star has to do is this; smash crushers (moving off the crusher when the tank calls for it, more on that in the tanks section), get people out of contrictors whenever possible, and when there are no crushers or constrictors up, kill corruptors. They will move to wherever the next crusher is and clear out the area around that.
When the portal team kills all the tentacles and are on the yogg brain, the tentacles become stunned, making them much easier to kill and no new ones spawn.
Rinse repeat. If you find at any time that you are becoming overrun with tentacles call a heroism (requires a second shammy in the main room team) to help clear them out during a stunned phase if the melee were a bit slow that time (this might happen on the third portal). At the end of each stun phase there should be very few corruptors up. By few I mean less than 5.
Tanks
Your job is to reset crushers - the big huge tentacles. This is done the following way; Watch for the cast, call for DPS to change targets, wait a second until the stacks drop off, run in and hit the crusher, call for DPS again. Rinse, repeat as necessary.
Healers
There really isn't a lot of healing going on. Stay with the ranged team and heal as required. What IS necessary is decursing, and there will be a lot of it.
Phase 3
OK, so you made it to P3 with perhaps a crusher up and a couple of tentacles. Most of the raid is alive and no one is insane.
Adds:
Tanks pick up the adds as soon as possible, they hit like mack trucks to begin with, but get the pro melee team onto them and they soon shrink down into kittens. Get your taunts off as soon as you can, and stay with your back to yogg the entire time. This should be not too bad to achieve.
Melee:
DPS adds. You should be able to do this with your back mostly to yogg for maintained DPS time.
Healers:
Stand with your back to yogg and heal and decurse. Watch the boss timers for add spawns and time a nice big heal for that first hit from the add - it's a doozy.
Ranged:
Melt brain. Go hard, everyone is counting on you.
Troubleshooting:
Ok so you make it to phase 3 consistently, but you are still wiping. What's going on? Ask youself these questions:
Was P1 perfect?
Were all the adds from P1 dead before tentacles from P2 spawned?
Did melee kill all the tentacles in the portals?
Were brain link and the green death beams managed?
Were constrictors killed in a timely manner?
Were crushers dead by the end of the stun?
Did melee keep corruptors under control after a portal phase?
Did ranged stack on star and assist correctly?
Did you get to P3 in 3 portal phases?
Were there 1 or less crusher and 5 or less corruptors up at the start of P3?
Were there 23 or more alive, un MCed raid members ready to go into P3?
Did everyone stay calm in P3 and do their jobs?
If you answer no to any of these questions you need to figure out why you answered no and fix it. And just remember, the fix for a problem in P3 might be in the execution of P1!
This boss has the best wipe enrage mechanic I have seen! I wont tell you what it is, I just hope you get to experience it because that it part of the learning curve to kill yogg!
Good luck
Yogg was recently nerfed (you can look up the changes on the blizzard website) and I dont actually think it will make much of a difference to anyone still working on downing him with 4 watchers. It WILL make a huge difference to the hard modes (not losing as much sanity being the major one). No MCs in Phase 1 doesn't really make a huge difference to the phase, it just removes the RNG from it and causing needless wipes. So, I actually agree with that one. Nerfing the spawn rate I think was unnecessary.
Shopping list:
3 tanks
5 healers
8-9 melee
9-8 ranged
Tips for the fight with 4 watchers. At all times your raid should maintain their own sainty. The green beams give you back 20% per tick.
Phase 1
This was fairly straight forward. We stand near the door to avoid the gas clouds. Tanks ferry the adds to sara. We DPS the adds to about 30% before switching to the next one. We also have about 3 ranged DPS who are capable of dodging clouds nearer the centre to finish off adds that need a hand. We do not spawn an extra add, we dont need to to just kill yogg. Once Sara is dead, split the additional mobs up and smash them down. Healers watch and heal up the explosions.
Key things:
Make sure every add hits Sara. Do not spawn any extra adds. Keep this phase under control and clean up all adds before phase 2.
Phase 2
You must have cleared out all the phase 1 adds before the tentacles appear! Very important.
Melee team
There are 10 portals, East, North and West. Allocate 9 melee and one healer to enter these portals. Allocate groups of 3 to the 3 sides to make it easier. Once someone enters a portal THAT PORTAL VANISHES, so the allocation really does help. If you are having issues, allocate individuals portals, but I hope that would not be necessary.
If a melee gets put in a constrictor on the way to their portal, the other 2 melee must get them out. If by chance that melee is the last one through the portal, and they are nowhere near the ranged team, sorry... wait for a b-rez - that is literally bad luck. The melee need to look after their own.
If a melee gets brainlinked, who ever is brainlinked with the melee MUST go with them to the portals, then return to their own job once the link severs as the melee go in the portal.
This is all about tentacle control. The faster the tentacles are killed in the portals, the less spawn in the main room. Melee are on the clock, do not skip a sinlge tentacle, and smash them as fast as possible. Blow all cooldowns on the first portal phase - and get the yogg brain to about 75%. Dont forget to turn your back to the skulls. This is not as easy as you might think. But with a bit of practise you will learn where the skulls could be (they are randomly placed in the room) and where to stand to minimise their impact. I cant really describe them here, just practise will help. But generally, if you have your back to the room and are facing the tentacles, you will be ok most of the time.
Once the tentacles are all dead, you head into the brain room. Yoggs hitbox is huge so eyeball the exit portal and head toward it as you DPS. There are dangly tentacles which move around and CAN get in the way of you clicking the exit portal and get you insane. Be aware of this and don't nub it up.
When melee get spat back out, they need to clean up all the corruptor tentacles they can possibly find.
When the portal phase comes up again, melee head back in (cleaning up corruptors and constrictors on the way) and this time blow heroism. Again, get to Yogg as soon as possible without missing a tentacle (remember killing tentacles in the portals means less outside) and smash him to about 50%. Pop out, kill corruptors and constrictors.
Third portal, blow any CDs that have come up and get Yogg to 30%. It is imperative that this happen on the third portal phase. Any more and you will run over the timer and probably be overrun with tentacles in phase 3.
Ranged Team
You guys get to stay outside. Mark up the main assist (your best ranged player) with an icon. Ensure that person has the ability to put their own marker back on themselves as DBM will probably remove it if something happens to them like brain link. If possible have a couple of people spamming a macro to mark up the assist. I also recommend reminding people on vent/ts to keep stacking on star (our symbol).
All ranged must stack on star and assist star at all times.
Now, what star has to do is this; smash crushers (moving off the crusher when the tank calls for it, more on that in the tanks section), get people out of contrictors whenever possible, and when there are no crushers or constrictors up, kill corruptors. They will move to wherever the next crusher is and clear out the area around that.
When the portal team kills all the tentacles and are on the yogg brain, the tentacles become stunned, making them much easier to kill and no new ones spawn.
Rinse repeat. If you find at any time that you are becoming overrun with tentacles call a heroism (requires a second shammy in the main room team) to help clear them out during a stunned phase if the melee were a bit slow that time (this might happen on the third portal). At the end of each stun phase there should be very few corruptors up. By few I mean less than 5.
Tanks
Your job is to reset crushers - the big huge tentacles. This is done the following way; Watch for the cast, call for DPS to change targets, wait a second until the stacks drop off, run in and hit the crusher, call for DPS again. Rinse, repeat as necessary.
Healers
There really isn't a lot of healing going on. Stay with the ranged team and heal as required. What IS necessary is decursing, and there will be a lot of it.
Phase 3
OK, so you made it to P3 with perhaps a crusher up and a couple of tentacles. Most of the raid is alive and no one is insane.
Adds:
Tanks pick up the adds as soon as possible, they hit like mack trucks to begin with, but get the pro melee team onto them and they soon shrink down into kittens. Get your taunts off as soon as you can, and stay with your back to yogg the entire time. This should be not too bad to achieve.
Melee:
DPS adds. You should be able to do this with your back mostly to yogg for maintained DPS time.
Healers:
Stand with your back to yogg and heal and decurse. Watch the boss timers for add spawns and time a nice big heal for that first hit from the add - it's a doozy.
Ranged:
Melt brain. Go hard, everyone is counting on you.
Troubleshooting:
Ok so you make it to phase 3 consistently, but you are still wiping. What's going on? Ask youself these questions:
Was P1 perfect?
Were all the adds from P1 dead before tentacles from P2 spawned?
Did melee kill all the tentacles in the portals?
Were brain link and the green death beams managed?
Were constrictors killed in a timely manner?
Were crushers dead by the end of the stun?
Did melee keep corruptors under control after a portal phase?
Did ranged stack on star and assist correctly?
Did you get to P3 in 3 portal phases?
Were there 1 or less crusher and 5 or less corruptors up at the start of P3?
Were there 23 or more alive, un MCed raid members ready to go into P3?
Did everyone stay calm in P3 and do their jobs?
If you answer no to any of these questions you need to figure out why you answered no and fix it. And just remember, the fix for a problem in P3 might be in the execution of P1!
This boss has the best wipe enrage mechanic I have seen! I wont tell you what it is, I just hope you get to experience it because that it part of the learning curve to kill yogg!
Good luck
Friday, May 8, 2009
Hey, NER, why no Thorim?
Yeah.
Don't get me started on this.
Thorim has managed to turn into our guilds current cock block.
Thorim currently has issues with lag and DCing, and if it coincides with Wintergrasp we have zero chance of doing anythign useful on this boss. Anyone with a slightly dodgey connection, Thorim will eat your connection and spit it out covered in goo. As you run in, it is guaranteed 1-25 people will DC. No jokes. Just hold off DPSing down the initial "entertainment" before engaging the boss until all the DCers are back online. We do a ready check before starting the event.
Thorim has a lot of aoe, and many many many adds. Do everything in your power to minimise CPU/GPU/bandwidth issues on your PC. Turn graphics down, turn OFF as many mods as you possibly can, stop FRAPSing, face walls etc etc. This place is WORSE than Dalaran.
Anyway, assuming you get past the DCs, there are a few tricks you NEED to do.
Arena: 2 tanks - one for champions, one for evokers. Evokers heal, so they need to be interrupted and killed asap. Champions are just plain nasty and need taking out. You can and should Disarm them to prevent WW, get your rogues, surv hunters and DPS warriors onto it. Your DPS MUST assist the 2 tanks when they call for DPS. Apart from that, AoE mobs and do your best to stay alive. All your healers should be raid healing in there, the splash damage is NUTS!
Gauntlet: If your team know what they are doing, I solo healed this (with an OH throwing up some Hots occasionally) as a Holy Pally. So very doable. Its preferable to have at least 1 CC (hunters, shammies, mages) 2 if you only have 1 tank. Engage mini boss as soon as possible. With the second mini boss, have an OT pick up the adds and get a hunter up the stairs and MDing the next miniboss to the other tank ASAP. And I mean, as soon as the doors open. Burn the mini boss down at the bottom of the stairs for more room for running away from people with the bomb. Then run up the stairs (ignore the adds completely). DO NOT run into the big circles or big purple bubbles will make life unpleasant (run left or right of them).
Then engage thorim.
Run away from the lightning on the floor (the further away from thorim you are the further away you have to run from the lightning) and BURN LIKE CRAZY!
That's about it. Enjoy!
Tuesday, April 28, 2009
Crazy Cat Lady - Auriaya
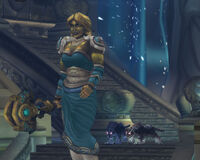
How do you say that anyway? Or-ee-ah-ya? Where is the syllable emphasis? or-EE-ah-ya? Or-ee-AH-ya? or-ee-ah-YA? What is it with this instance and names of bosses I completely fail at being able to pronounce or even simply get right?
Anyway, crazy cat lady is not hard. I mean that in the strat sense.
In this, it is all about the pull. We have a DK tank DnD pull while everyone hides behind a corner (cos those cats POUNCE on you). The Warrior tank throws up a shield wall (and other CDs) to deal with physical damage, the pounce cant be shield walled, so get a pally to use Hand of Sacrifice on the tank to soak the pounce damage (bubbling helps here). The MT picks up Crazy cat lady, the DK taunts 2 cats off the warrior and takes them over there *points* 10 yards away, to deal with the debuffs.
Mark the cats up, and kill em. Then its cat lady's turn. Interrupt the sonic booms, and here's a handy trick to deal with the fears.
Get a priest in a group with a few healers and an interrupter (we had a rogue) perhaps the MT if you need. Priest uses fear ward on themselves and mass dispells the fear. Makes the fight almost trivial. Drop tremor totems for everyone else, or use personal fear removing abilities. Everyone move back to your positions after.
At some point another kitty will spawn, dps it down, and have the OT move it away from the raid to die (as it creates a big black icky spot on the ground that kills you. Not Nice).
Rinse, repeat! It's not at all hard. Like High King Maulgar, it's all about that pull, and I think HKM was harder.
Kologarn 25
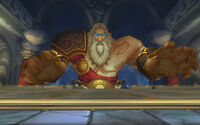
This one will be short, because there really is not a lot to be said about this boss.
The trash to this boss is annoying without a warlock. But judicious use of CC and you will be ok.
Kologarn himself is a very bug dude, I mean, we are the size of his belt buckle. The set up is easy, as per the standard you need 3 ish tanks, but you can probably do it with 2 if you had to.
There is a lot of directed and non directed damage in this fight, healers need to be on top of it.
The key to this fight is dealing with the eyebeams in such a way that your raiders don't run them through your raid exploding everyone in their path. The structure of the boss itself was something I really came to appreciate last night. There is a zone around the body of Kologarn where he does NOT target you for eyebeam, possibly for fear of missing and getting his nads. Pop your tanks and melee in there. Now, the hit box of the arms is HUGE, why is it huge? To cover the no eyebeam zone. This actually prevents hunters from being in there. The other mechanic to force ranged out is that this area silences casters. Neat huh? I thought so.
OK so melee are snugly in with the tanks stabbing at his stomach or arm uninterrupted.
Ranged, it's your time to shine!
We ended up in 2 ranged groups, one left one right with a healer allocated to each group. We spread out as much as we could, trying not to be one in front of the other. We also kept a path at the back free for kiting eyebeams. So, what we did was, eyebeam on you? run directly to the back wall and out the door. DO NOT run over someone else (hence the not trying to be in front of each other comment). Stay away from the adds (pew pew range them down).
That's it, that is the main trick to this fight. Really. Thats all! That is the main thing you need to do. And doing it right is not something you can explain. You just need to be aware and put in contingency plans for moving healers.
Eyebeams. Dont kill your raid mates with 'em and you will collect phat lewtz.
If you are having issues, try to melee stack the raid as much as possible.
The trash to this boss is annoying without a warlock. But judicious use of CC and you will be ok.
Kologarn himself is a very bug dude, I mean, we are the size of his belt buckle. The set up is easy, as per the standard you need 3 ish tanks, but you can probably do it with 2 if you had to.
There is a lot of directed and non directed damage in this fight, healers need to be on top of it.
The key to this fight is dealing with the eyebeams in such a way that your raiders don't run them through your raid exploding everyone in their path. The structure of the boss itself was something I really came to appreciate last night. There is a zone around the body of Kologarn where he does NOT target you for eyebeam, possibly for fear of missing and getting his nads. Pop your tanks and melee in there. Now, the hit box of the arms is HUGE, why is it huge? To cover the no eyebeam zone. This actually prevents hunters from being in there. The other mechanic to force ranged out is that this area silences casters. Neat huh? I thought so.
OK so melee are snugly in with the tanks stabbing at his stomach or arm uninterrupted.
Ranged, it's your time to shine!
We ended up in 2 ranged groups, one left one right with a healer allocated to each group. We spread out as much as we could, trying not to be one in front of the other. We also kept a path at the back free for kiting eyebeams. So, what we did was, eyebeam on you? run directly to the back wall and out the door. DO NOT run over someone else (hence the not trying to be in front of each other comment). Stay away from the adds (pew pew range them down).
That's it, that is the main trick to this fight. Really. Thats all! That is the main thing you need to do. And doing it right is not something you can explain. You just need to be aware and put in contingency plans for moving healers.
Eyebeams. Dont kill your raid mates with 'em and you will collect phat lewtz.
If you are having issues, try to melee stack the raid as much as possible.
Monday, April 27, 2009
Baby Faced XT-002 Deconstructor
XT, I swear, has some of the most amusing emotes currently in the game. He(?) also has the emotes which are likely to get the most annoying fast in the game.
So, some tips for getting the kid down.
Raid makeup:
1 MT + 2ish MT healers
2 OTs + 1 OT healer
Melee
Ranged
4 Ranged healers (you will need it)
First up is raid distribution.
Deadly boss mods has a thing that you can use which is a range finder. Type /range then drag it where you like it. Right click on it and set the range to 15(ish) yards. This is really important for later.
Tanks and melee and the OT healer
This one your MT tanks XT in the middle where he paces to, MT healers are at a safe distance behind the MT. Melee split into 2 groups, one on the right arse cheek one on the left. Melee need to make sure their range checker does NOT have the MT on it, nor the OT/Melee healer. The OT/melee healer stands at range behind the melee. Yes, behind. When melee get grav bomb or light well, they run off to the left or right (as is sensible) and get out of range of the other melee. They stay IN range of their healer. It is easy enough to do. If the MT gets moved everyone repositions, don't just mill around like an idiot and wonder why you cant reach the melee anymore or why you are not getting heals.
XT has a massive hit box, take advantage of that.
The melee stay on the boss, then move to the heart, then back on the boss. Rinse repeat. They assist on adds as required.
OTs and the OT Healer
There are 2 OTs, one for the left side one for the right. They need to pull adds they are tanking towards the stairs so the OT healer can keep them alive. Help from the "raid healers" may be required.
Ranged and add control
The MT healers get first pick of spots. Everyone else spreads out, that range checker should be on, and no one should be within 15ish yards of each other - this means minimal movement. Raid healers allocated to "left" "right" and "middle" as necessary. Ranged should be allocated to add spawn points as necessary; do your thing when the adds are out and smash the boss/heart when not. Never under any circumstances, let the little crappy bots get to XT. Get melee on it if you have to, but XT must never heal.
The Heart
This is probably the most important part of killing XT. If you can afford to ignore adds during this phase, I really recommend you just let the OTs to it. The first heart phase is the most important, there are no adds up and everyone can DPS the heart, except trees. Leave the trees to heal. Pop Heroism, pop all your CDs, get as much DPS on that heart the first time around as you can. If you do enough DPS then smash XT, you will miss a tantrum or several as you will have skipped past it on the health meter. The more tantrums you can miss, the easier it will be on the healers.
That's it. Not hard really, just a bit punishing on the healers and keeping the adds under control (as usual) is key. Good Luck!
So, some tips for getting the kid down.
Raid makeup:
1 MT + 2ish MT healers
2 OTs + 1 OT healer
Melee
Ranged
4 Ranged healers (you will need it)
First up is raid distribution.
Deadly boss mods has a thing that you can use which is a range finder. Type /range then drag it where you like it. Right click on it and set the range to 15(ish) yards. This is really important for later.
Tanks and melee and the OT healer
This one your MT tanks XT in the middle where he paces to, MT healers are at a safe distance behind the MT. Melee split into 2 groups, one on the right arse cheek one on the left. Melee need to make sure their range checker does NOT have the MT on it, nor the OT/Melee healer. The OT/melee healer stands at range behind the melee. Yes, behind. When melee get grav bomb or light well, they run off to the left or right (as is sensible) and get out of range of the other melee. They stay IN range of their healer. It is easy enough to do. If the MT gets moved everyone repositions, don't just mill around like an idiot and wonder why you cant reach the melee anymore or why you are not getting heals.
XT has a massive hit box, take advantage of that.
The melee stay on the boss, then move to the heart, then back on the boss. Rinse repeat. They assist on adds as required.
OTs and the OT Healer
There are 2 OTs, one for the left side one for the right. They need to pull adds they are tanking towards the stairs so the OT healer can keep them alive. Help from the "raid healers" may be required.
Ranged and add control
The MT healers get first pick of spots. Everyone else spreads out, that range checker should be on, and no one should be within 15ish yards of each other - this means minimal movement. Raid healers allocated to "left" "right" and "middle" as necessary. Ranged should be allocated to add spawn points as necessary; do your thing when the adds are out and smash the boss/heart when not. Never under any circumstances, let the little crappy bots get to XT. Get melee on it if you have to, but XT must never heal.
The Heart
This is probably the most important part of killing XT. If you can afford to ignore adds during this phase, I really recommend you just let the OTs to it. The first heart phase is the most important, there are no adds up and everyone can DPS the heart, except trees. Leave the trees to heal. Pop Heroism, pop all your CDs, get as much DPS on that heart the first time around as you can. If you do enough DPS then smash XT, you will miss a tantrum or several as you will have skipped past it on the health meter. The more tantrums you can miss, the easier it will be on the healers.
That's it. Not hard really, just a bit punishing on the healers and keeping the adds under control (as usual) is key. Good Luck!
Friday, April 24, 2009
Razorscale/gore/fang/face/wing/thing
 For some reason I keep calling this boss some variant of razor that isn't actually its name. No idea why, but I blame Nethersprite. It's all his fault.
 Anyway, there are a few strats out there for this boss, some involve spreading out, some involve bunching up. We kinda did something halfway inbetween and MAN did it make healing easy. Again, I am not writing up the boss strat, you can look that up yourself.
Firstly, and importantly: Stay inside the circle (or as close to that as possible).
Phase 1 (100%-50%)
We had 3 tanks, our warrior was in charge of tanking the whirlwind guy. The other two picked up everything else, one on the left side, one on the right. Melee were split into 2 groups, one for the left tank, one for the right tank. It was melee's job to interrupt the chain lightnings. Really important to stay on top of that as that chain lightning HURTS and can oneshot the last person on the chain (as I found painfully one time). There was one MT healer allocated to each tank.
Ranged hang out in the middle, and dps whatever. BUT if the big whirlwind guy comes out, they have to switch targets and burn that add down asap. Melee STAY AWAY or you will become very splattered.
Raid healers hang out in the middle, and keep an eye on melee and ranged. If melee are doing their job, there should be little AoE damage. But hang on... what about the blue flame? I hear you ask. AH....
Razorface, we noticed, targets the closest person to it with the blue flame. So we had a designated "flame tank" whose job it was to dance underneath Razorblade and attract his attention. This allowed the healers a much better chance of keeping people alive. Raid damage became controllable and predictable. We have not seen this written anywhere, but we experimented with it, and it seems to be holding true.
At some point you will bring Razorgore down and it will be time to PWN FACE. Adds, at this stage, should be left to their own devices and held in check by the tanks. Resto druids should be keeping these tanks alive (as trees cant DPS. Fail trees). Everyone and his pet worg should be throwing everything they have got at Razorfang. Pop cooldowns, pop heroism, pop haste pots... think of sarth 3d type zerg then buff that drake by 175% (I'm not kidding). Yell at your DPS to go hard, I wanna see holy novas, holy shocks and electricity! I wanna see crits and hysteria! I want to see that boss percentage SUB 75% on that first grounding.
Ok, up it flies and it's time to head back into position and back to taking care of business.
Second grounding you want that proto-mechano-drake sub 50%. GO hard. This fight is much easier if you only have 2 ground phases not 3. 3 is doable, but you are likely to down it after enrage.
Phase 2 (50%-splat)
 Ok, now get your MT (who should be the whirlwind tank) straight onto that dragon cos all of a sudden there's an aggro table! so be careful! Now, the tanks will be taking a debuff called "fuse armour". When it hits 2 stacks swap tanks. All Tank healers keep the current MT up.
DPS should get all the adds down first to free up the tanks to tank razorthing. Then everyone on the boss. Kill kill kill! Beat that enrage timer, check CDs at this point.
See that circle on the ground? Yeah? good. The current tank needs to kite backwards along that circle, like grobbulous. NO ONE gets ahead of the tank on that fight or you DIE. Watch for fire on the ground melee and all is good.
That's it. Not a difficult fight, just a lot of damage going around and a lot of chaos and some SERIOUS DPS required.
25 Flame Leviathan - plus two or three towers
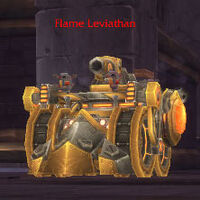
Everyone knows how to do Flame Leviathan, I am not going to explain the basic strat, I am going to explain things that are VITAL to getting a two or three towers under control. Four towers is an entirely different matter, that will have it's own strat post.
There was a lot of confusion about "hard mode". When you start, you can initiate the event by talking to one of two people. If you talk to Brann, none of the orbital defense systems are activated. This is Normal Mode.
If you talk to Norgs (as I affectionately dubbed him) he sets off the towers. All of them. As you move through the gauntlet you DESTROY the ones you do not want to do, leaving up the ones you do.
The towers we are currently doing (in order of preference) include:
Tower of Storms (Thorim's Hammer) – deals Boosts Flame Leviathan's Physical Damage by 25%. Shortly after the fight starts, Flame Leviathan will activate Thorim's Hammer. Thorim's Hammer causes pillars of light to appear and shortly afterward do around 10% (150k or so) damage to any targets under the beam along with a 1% damage AOE to all vehicles. Total of about 20 Beams. Flame Leviathan will activate this only once. Just, dont stand in any beams and you will be ok.
Tower of Flames (Mimiron's Inferno) – Boosts Flame Leviathan's Fire Damage by 50%. Shortly after the fight starts, Flame Leviathan will activate Mimiron's Inferno. Mimiron's Inferno causes fiery orbs to fall from the sky in a slowly set path. Orbs start where Flame Leviathan entered the room and continues in a clockwise direction in a diamond formation. Orb strikes deals fire damage to all nearby enemies, leave behind a flaming blaze that deal damage over time when touched. Effect lasts for the entire fight but are pretty easy to avoid.
Tower of Frost (Hodir's Fury) – Hodir's Fury cause's several White-Teal beams to appear and follow players around. The beam itself does no damage but after it stops moving on top of a vehicle, it will call down a ball of frost that deals frost damage to all nearby enemies and entombing them in ice where they take an additional 1% damage per second. Ice is broken by a fire attack. Effect lasts for the entire fight. Simply move directly forward or backward when you see the beam"lock on" to you and you will avoid this.
The above three towers are pretty easy mechanically. One leaves a trail of fire you need to avoid (easy if you pay attention), one has big beams from the sky that chase you around and one puts out a singular random event of big blue AoE bolts from the sky. Save shields for this event. Apart from that, it is business as usual, except FL has more health, so you just need to be good at not taking damage and good at dealing it.
Shutdowns
The key to this fight are the shutdowns.
Send 2-3 people up as soon as FL is engaged. They are marked, their vehicles are marked, and we have allocated a chopper to each player to pick them up and deliver them back to their vehicle after shut down. They then quickly grab some pyrite and are thrown up as soon as possible. Getting this cycle right, ensuring there is minimal down time and that the people do not die is the way to kill this boss.
The 3 people are 2 DPS and a DPS off healer (like an ele shammy, they do this the best). If you have no healer up there you will die. It's not a lot of damage but it is enough to kill most guilds in Naxx or early Ulduar gear. You NEED to have ranged go up as when you are on top of FL you cannot move. You are thrown to a position with a tower to kill. Kill your tower, then target another tower and kill it asap. Once all 4 towers are destroyed, FL shutsdown and the DPS are flung off the top of the tower.
Once Flame leviathan has finished repairing his towers (the reason for the shutdown in the first place) he comes out of shutdown and activates again. As soon as shutdown is over, you can send up your team again to repeat the process.
DPS during a shutdown
This is where about 80% of your damage will come from. FL takes extra damage while in shutdown - take advantage of that.
Demolishers must be fully stocked or close to it (it takes 2 pyrite to fill the tanks), and they need to launch all their pyrite at FL during this phase. Those pyrite launchers do stupid amounts of damage. It doesn't matter if you dont DPS any other time (apart from keeping tar alight) your main job is to make sure all that pyrite lands during shutdown. If you are a passenger who is not on the tower, keep stocked with pyrite, mash your rockets (2) and keep tar alight (1).
Siege engine passengers should be keeping the odd tar alight with (1) but mostly mashing (2) as that is a very powerful attack.
Choppers get that tar down, and keep laying it! If you get bored, grab some pyrite and shuffle it near the demolishers.
Doing all of the above should get you a really good dose of death on FL.
What to do when NOT in shutdown
DPS is not so important at this point, but not unimportant, if that makes sense.
Demolisher passengers (once back in the vehicle) grab pyrite asap. Those not getting flung should be shooting down pyrite for the flung ones to quickly retrieve. Once they are done, load yourselves up. Keep tar alight, and DPS when you have time. Your job is to stay as alive as possible. Stay at range.
Siege engines get in and interrupt the flame jets. Passengers keep mashing (2) as you are the main DPS dealers for this phase of the fight and only hit (1) when you see unlit tar. When the 5s warning comes in your fave boss mod, all siege engines get away from FL so that you have a good head start on kiting if you happen to be picked. If Thorim's hammer comes, make sure you have a shield ready (1 min CD). Passengers, if you can, make sure that you shoot down pyrite when possible as well!
Choppers will pick up their person, and return them to their vehicle as fast as they can, then back to dodging around and dropping tar. Again, try shuffling pyrite into the middle to help the demolishers.
What to do when kiting
Run away. Stay as far away as possible. Passenger should be liting tar as they go. Kite the FL through tar, I cannot stress how important that is, and make sure that tar is lit up. Avoid the orbital defense fires, try not to get trapped by them. Easy *cough* yes, easy!
That's it. Rinse repeat. Make sure that you take as little damage as possible, and you maximise DPS during shutdown. It should take 2-3 shutdowns to get the boss down depending on how well you kite him through tar at other times.
This applies to 10 man as well, just fling 1-2 people not 2-3!
Practise your shutdowns with two or three towers up ready for four towers. Two or three towers have been nerfed a fair bit recently, and they are a lot easier now than when this guide was first written (We found that 4 towers now is as hard as 2 towers was back in 3.1.0). Yes, you can almost certainly Zerg through 2 towers now with no shutdowns. Three you might be pushing your luck, and doing 4 you definately need to shutdown, so you may as well get some pratcise in. Getting the shutdowns means the fight goes a lot quicker as well leaving you more time for working toward other hardmodes and Yogg!
Friday, March 20, 2009
Sarth 3D and killing yourself
Guilds complain that "The third drake lands and all our DPS just die?? WTF is that happening to you too???"
It is the reflected DPS part - the DPS killing themselves. As soon as our guild realised that was what was happening (even though we knew we didn't grok it for a ling time), and we told DPS to turn OFF their recount and manage their health (ie slow/stop DPS if they are low, save healthstones etc etc) we got Sarth down THAT NIGHT!
So, I suspect that is exactly what is happening to you, yes YOU! out there in Teh Internets!
Soooooo
Heres the scoop :)
Setup:
4 tanks
Bear tank 50+k HP raid buffed (as big as possible)
Warr tank - Drakes (all of them)
Prot pally AND a DK - adds
6 healers:
1 holy pally - soley on the furry tank (yes, you can solo heal this with a few hots)
1 Direct healer - Warr (shamans chaining to melee here is pro)
1 Direct healer - add tanks
3 raid healers - holy priests and resto droods - hots up on any and all tanks in range.
15 DPS - yes. Take them. Make sure they are stocked with haste potions. Try to take more ranged than melee if possible.
Strat (with useful TIPs!!!)
Tank sarth near the door - tank him on that little island thing, moving to the main island for flame wall. Rinse repeat till dead.
Drake 1: take him up the back.
TIP! If the first Flame wall is a "ranged one" (ie the gap is in the middle) you can jump in the lava to dodge the flame wall and continue to DPS much faster than running to the middle.
Those precious seconds count (look this up on teh nets). Our tank then drags the drake to the middle slowish (to maintain melee DPS) ready to pick up the second drake.
DPS use heroism on this first drake. This drake should be dead (or very close to it) before the second drake engages. Dont stand in blue shit (melee stack up and call out on vent when they need to move, range do something similar). Self manage, dont die. 25 people should be alive at the end of drake 2.
Add tanks: run around like dickheads pulling adds to them. the DK is pro at picking up the adds, the pally is pro at tanking them. We found this combo to be really effective and it made a massive difference to DPS and more especially healers grabbing aoe healer aggro.
Drake 2: MD to warr who tanks it on left side (as you enter).
TIP!!! Make sure there is a clear path from where the drake lands to where the warr tank is or people will die to cleaves and flame breath.
Repeat stuffs from drake 1, except no heroism - use haste flasks. Drake 2 should be sub 20% when drake 3 lands.
Drake 3: GAH THIS IS IT PEOPLE!!!
Sarth tank - use a single cool down per flame breath to assist the pally healer, call out 4sish before each breath for a "oh $#!t" ability to be used on him - hand of sanc, pain supporession, the holy priest save from deaht one I have temporarily forgotten the name of. You will need about 4, more than 4 and you are taking too long to kill the second drake. Organise an order, ensure all healers are clear on what they are doing and when.
MT pally healer HoS first - bacon yourself and heal through it. This healer will need to save their bubble to perhaps stand through a firewall as well, and this part is the hardest on them. Save mana for this. If you need, enlist help from the add tank healer. Go hard, win.
Other healers - just go hard healing. As hard as you can.
Warr tank, get an MD from the third drake and use your shield wall/last stand/other CDs to help your healer as much as you can.
Add tanks - continue as normal.
DPS - WINNING TIP! At this stage, all your DPS on the second drake is being reflected back onto you. This is why alot of guilds die at this point. DPS are so focussed on kill drake fast, they are actually killing themselves. Self manage. If your health is getting low, stop/slow DPS and use your healthstones (save for this point). the retard spec wont help at this point (it might be making things worse if you are not a prot pally). Ret pallys switch from matryr to command. DPS SMART. Get that drake down within 40s (that's 4 OH $#!ts from the healers on the MT) 40s is a long time...
Right, second drake down - NEARLY home free, but first get rid of all those adds. DPS them down down down fast.
Drake 3 portals - GET in NOW! all DPS and 1-2 aoe healers (1 is best, there's still a lot of damage going on outside and tanks will be low and healers will be on low mana). Anyone in plate can tank those adds - best is a dps warr throwing on a sword and board (macroed to defensive stance is the best). Manage DPS to ensure that the portal adds die just AFTER a flame wall has passed - so those on the outside need to yell it out - or everyone will pop out of the portal only to go splat on a fire wall. Trust me, this is annoying! finish add, burn drake 3.
Rinse repeat.
Sarth. OMG OMG OMG OMG 3 DRAKES DOWN!!!! Dont lose it too much, even if you have half your DPS down, you can at this point still win! just keep focussed, dont die in a fire and your save your second heroism for the mini enrage at the end.
Collect Phats lewts and title.
It is the reflected DPS part - the DPS killing themselves. As soon as our guild realised that was what was happening (even though we knew we didn't grok it for a ling time), and we told DPS to turn OFF their recount and manage their health (ie slow/stop DPS if they are low, save healthstones etc etc) we got Sarth down THAT NIGHT!
So, I suspect that is exactly what is happening to you, yes YOU! out there in Teh Internets!
Soooooo
Heres the scoop :)
Setup:
4 tanks
Bear tank 50+k HP raid buffed (as big as possible)
Warr tank - Drakes (all of them)
Prot pally AND a DK - adds
6 healers:
1 holy pally - soley on the furry tank (yes, you can solo heal this with a few hots)
1 Direct healer - Warr (shamans chaining to melee here is pro)
1 Direct healer - add tanks
3 raid healers - holy priests and resto droods - hots up on any and all tanks in range.
15 DPS - yes. Take them. Make sure they are stocked with haste potions. Try to take more ranged than melee if possible.
Strat (with useful TIPs!!!)
Tank sarth near the door - tank him on that little island thing, moving to the main island for flame wall. Rinse repeat till dead.
Drake 1: take him up the back.
TIP! If the first Flame wall is a "ranged one" (ie the gap is in the middle) you can jump in the lava to dodge the flame wall and continue to DPS much faster than running to the middle.
Those precious seconds count (look this up on teh nets). Our tank then drags the drake to the middle slowish (to maintain melee DPS) ready to pick up the second drake.
DPS use heroism on this first drake. This drake should be dead (or very close to it) before the second drake engages. Dont stand in blue shit (melee stack up and call out on vent when they need to move, range do something similar). Self manage, dont die. 25 people should be alive at the end of drake 2.
Add tanks: run around like dickheads pulling adds to them. the DK is pro at picking up the adds, the pally is pro at tanking them. We found this combo to be really effective and it made a massive difference to DPS and more especially healers grabbing aoe healer aggro.
Drake 2: MD to warr who tanks it on left side (as you enter).
TIP!!! Make sure there is a clear path from where the drake lands to where the warr tank is or people will die to cleaves and flame breath.
Repeat stuffs from drake 1, except no heroism - use haste flasks. Drake 2 should be sub 20% when drake 3 lands.
Drake 3: GAH THIS IS IT PEOPLE!!!
Sarth tank - use a single cool down per flame breath to assist the pally healer, call out 4sish before each breath for a "oh $#!t" ability to be used on him - hand of sanc, pain supporession, the holy priest save from deaht one I have temporarily forgotten the name of. You will need about 4, more than 4 and you are taking too long to kill the second drake. Organise an order, ensure all healers are clear on what they are doing and when.
MT pally healer HoS first - bacon yourself and heal through it. This healer will need to save their bubble to perhaps stand through a firewall as well, and this part is the hardest on them. Save mana for this. If you need, enlist help from the add tank healer. Go hard, win.
Other healers - just go hard healing. As hard as you can.
Warr tank, get an MD from the third drake and use your shield wall/last stand/other CDs to help your healer as much as you can.
Add tanks - continue as normal.
DPS - WINNING TIP! At this stage, all your DPS on the second drake is being reflected back onto you. This is why alot of guilds die at this point. DPS are so focussed on kill drake fast, they are actually killing themselves. Self manage. If your health is getting low, stop/slow DPS and use your healthstones (save for this point). the retard spec wont help at this point (it might be making things worse if you are not a prot pally). Ret pallys switch from matryr to command. DPS SMART. Get that drake down within 40s (that's 4 OH $#!ts from the healers on the MT) 40s is a long time...
Right, second drake down - NEARLY home free, but first get rid of all those adds. DPS them down down down fast.
Drake 3 portals - GET in NOW! all DPS and 1-2 aoe healers (1 is best, there's still a lot of damage going on outside and tanks will be low and healers will be on low mana). Anyone in plate can tank those adds - best is a dps warr throwing on a sword and board (macroed to defensive stance is the best). Manage DPS to ensure that the portal adds die just AFTER a flame wall has passed - so those on the outside need to yell it out - or everyone will pop out of the portal only to go splat on a fire wall. Trust me, this is annoying! finish add, burn drake 3.
Rinse repeat.
Sarth. OMG OMG OMG OMG 3 DRAKES DOWN!!!! Dont lose it too much, even if you have half your DPS down, you can at this point still win! just keep focussed, dont die in a fire and your save your second heroism for the mini enrage at the end.
Collect Phats lewts and title.
Friday, January 23, 2009
When the patch notes, aren't
So, we went into Malygos last night. We had been getting him down fairly solidly and thought that we had a shot at starting to work towards the 5 (now 6) minute achievement on this boss.
Boy, were we wrong.
We got in there, did our usual strat (bunch up at the edge of the hitbox, pull sparks toward us, and so forth) and found that our Prot Warr was struggling with threat. Not only that, but the raid was taking very large swathes of very nasty damage. Much more than previously. All the healers were up in arms in the healer channel, not knowing what on earth was going on. Yes, we knew that the encounter would be HARDER with a cooldown on CoH/WG, but this is above and beyond what we were expecting. When the entire raid takes a 17khit just before a vortex, that's a wipe. And why were DPS calling out for hand of salv? What was going on with threat?
What the hell was going on?
Problem 1
Given how hard it was for us to find information on changes, no one believed that there were changes. The healers, however, were screaming in the healer channel that something was very wrong. As a healer myself, you get a feel for the amount of damage going around, and you have an idea of what to expect. It becomes very obvious to you when things are going awry (but I will write more on a healers gut feeling is good in another blog) even if everyone else has no idea, because as a healer you are covering it all off.
A fundamental mechanic of the fight had been changed in 3.0.8 but we didnt know what it was. After a fight with the Raid leaders (basically me saying "You are wrong, something is changed, this is not normal" and the Raid leader being totally awesome and researching the issue even if he didn't believe it) our RL found the blog mymagesucks who had blogged on exactly this topic and outlined the issue.
The short version is this: We were getting totally owned by a debuff from arcane breath called Arcane Blast. This is placed on any person who is "breathed" on by Malygos. The radius of the blast had been increased in 3.0.8 by a factor of 4 and this had not been mentioned in the patch notes but had been hinted at on MMO-Champion by way of the achievement text.
The implications are that previously, when a melee copped the breath they were healed through it and maybe they hit one other person. NOW, given the warp factor 4, melee have to actively move away from the tank and stop meleeing when the debuff is there and any melee that was previously badly positioned (and didnt know because we healed through it) now EXPLODED THE ENTIRE RAID.
This was particularly evident just before the vortex when our tank (before we realised) ran back into the group too early and caused the situation I described above.
Problem 2
DPS were calling for hand of salv. DPS grabbed aggro and WIPE! Our prot warrior was getting very frustrated with it all. I asked him to go through his combat log to figure it out. We were blaming positioning, his gear, his spec his STYLE everything. There was something very wrong with his tanking - but we had no idea what it was.
Our furry tank stepped up and we got to phase 3. What the hell? 2 attempts later (we were at this stage still struggling to identify problem 1) the warrior pipes up and says "I know what it is, Warrior threat is still broken when we die. I need to do a stance dance each death to reset it". Now, I need to talk to our MT about what exactly this bug is, but it is SERIOUS and it really screws threat (I am sure tankspot would have the details or Elitist Jerks). So, the prot warrior says that he is ready to try again, and BLAM no more threat issues.
A couple more goes to get the hang of the new strat and malygos goes down (Unfortunately I was a complete nub and died on my drake very early, so I was yelling at the raid to stack a lot. I think it helped)
So what does this mean?
It means that we had a horrible night of yelling and screaming at each other trying to figure out what was going on. But it also showed what we can do together as a group, that we CAN yell at each other and still work toward a common goal and achieve that goal.
It means that you should trust your instincts. If you feel something is not right, or something has fundamtenally changed, it probably has. Especially if you feel this right after a patch. Trust your healers as well - they have a very good idea of the actual mechanics of damage dealing (as they have to predict it in order to compensate for it in fights) and if they say that the damage distribution has changed somehow, listen to them.
It means... never trust the patch notes. 95% of the changes are never listed.
Boy, were we wrong.
We got in there, did our usual strat (bunch up at the edge of the hitbox, pull sparks toward us, and so forth) and found that our Prot Warr was struggling with threat. Not only that, but the raid was taking very large swathes of very nasty damage. Much more than previously. All the healers were up in arms in the healer channel, not knowing what on earth was going on. Yes, we knew that the encounter would be HARDER with a cooldown on CoH/WG, but this is above and beyond what we were expecting. When the entire raid takes a 17khit just before a vortex, that's a wipe. And why were DPS calling out for hand of salv? What was going on with threat?
What the hell was going on?
Problem 1
Given how hard it was for us to find information on changes, no one believed that there were changes. The healers, however, were screaming in the healer channel that something was very wrong. As a healer myself, you get a feel for the amount of damage going around, and you have an idea of what to expect. It becomes very obvious to you when things are going awry (but I will write more on a healers gut feeling is good in another blog) even if everyone else has no idea, because as a healer you are covering it all off.
A fundamental mechanic of the fight had been changed in 3.0.8 but we didnt know what it was. After a fight with the Raid leaders (basically me saying "You are wrong, something is changed, this is not normal" and the Raid leader being totally awesome and researching the issue even if he didn't believe it) our RL found the blog mymagesucks who had blogged on exactly this topic and outlined the issue.
The short version is this: We were getting totally owned by a debuff from arcane breath called Arcane Blast. This is placed on any person who is "breathed" on by Malygos. The radius of the blast had been increased in 3.0.8 by a factor of 4 and this had not been mentioned in the patch notes but had been hinted at on MMO-Champion by way of the achievement text.
The implications are that previously, when a melee copped the breath they were healed through it and maybe they hit one other person. NOW, given the warp factor 4, melee have to actively move away from the tank and stop meleeing when the debuff is there and any melee that was previously badly positioned (and didnt know because we healed through it) now EXPLODED THE ENTIRE RAID.
This was particularly evident just before the vortex when our tank (before we realised) ran back into the group too early and caused the situation I described above.
Problem 2
DPS were calling for hand of salv. DPS grabbed aggro and WIPE! Our prot warrior was getting very frustrated with it all. I asked him to go through his combat log to figure it out. We were blaming positioning, his gear, his spec his STYLE everything. There was something very wrong with his tanking - but we had no idea what it was.
Our furry tank stepped up and we got to phase 3. What the hell? 2 attempts later (we were at this stage still struggling to identify problem 1) the warrior pipes up and says "I know what it is, Warrior threat is still broken when we die. I need to do a stance dance each death to reset it". Now, I need to talk to our MT about what exactly this bug is, but it is SERIOUS and it really screws threat (I am sure tankspot would have the details or Elitist Jerks). So, the prot warrior says that he is ready to try again, and BLAM no more threat issues.
A couple more goes to get the hang of the new strat and malygos goes down (Unfortunately I was a complete nub and died on my drake very early, so I was yelling at the raid to stack a lot. I think it helped)
So what does this mean?
It means that we had a horrible night of yelling and screaming at each other trying to figure out what was going on. But it also showed what we can do together as a group, that we CAN yell at each other and still work toward a common goal and achieve that goal.
It means that you should trust your instincts. If you feel something is not right, or something has fundamtenally changed, it probably has. Especially if you feel this right after a patch. Trust your healers as well - they have a very good idea of the actual mechanics of damage dealing (as they have to predict it in order to compensate for it in fights) and if they say that the damage distribution has changed somehow, listen to them.
It means... never trust the patch notes. 95% of the changes are never listed.
Subscribe to:
Posts (Atom)
